Cool Science
  • Home
  • Who We Are
    • History & Mission
    • Staff & Board
  • What We Do
    • Cool Science Festival (Schedule) >
      • Cool Science Carnival Day
      • Sponsors
      • Join the Festival >
        • Present a Carnival Day Activity
        • Host a Special Event
        • Volunteer Yourself
        • Volunteer Your Group
        • Contact the Festival
      • Previous Festivals >
        • 2024 Cool Science Festival
        • 2024 Cool Science Carnival Day
        • 2023 Cool Science Festival
        • 2023 Cool Science Carnival Day
        • 2022 Cool Science Festival
        • 2022 Cool Science Carnival Day
        • 2021 Festival
        • 2021 Carnival Day
        • 2020 Festival
        • 2020 (Virtual) Carnival Day
        • 2019 Festival
        • 2019 Carnival Day
        • 2018 Festival
        • 2018 Carnival Day
      • CS Cool Science Festival YouTube
    • Outreach Programs Overview >
      • Demonstration Shows >
        • Demonstration Shows: CO Science Standards
      • Hands-on Programs >
        • Hands-on Labs: CO Science Standards
      • Science or STEM/STEAM Days & Nights, Science Busking
      • Day of Science
      • Mobile Earth & Space Observatory
    • Big Cool Science Day at Colorado College
    • Kid's Mini Fruitcake Toss
    • Science on Tap
    • Calendar
  • Cool Stuff
    • Try Science At Home
    • Teaching Resources
    • Cool News
    • Cool Science Jokes
  • How To Help
    • Volunteer
    • Donate
    • Corporate & Foundation Donors
  • Contact Us
    • General Contact Info
    • Join Our Mailing List
    • Request A Program

Try Science at Home
​Cool Earth & Environment

Chocolate Rocks!

8/4/2020

0 Comments

 
All rocks are one of three basic types - igneous, sedimentary, or metamorphic.  Even though these words sound complicated, it is really pretty easy to see what they mean, by modeling what happens when different types of rocks are formed.  And, even though we could do that with clay or playdough, it is much more fun to do it with something we can eat!  Let’s make some chocolate rocks!
Click and expand the tabs below to get started.
what you'll need
  • Either white chocolate chips and milk chocolate chips OR colored baking chips (NOT M&Ms - they don't work)
  • Aluminum foil
  • Small microwave-safe bowl
  • Butter knife
  • A freezer OR a cooler with ice
  • Microwave oven
  • Something heavy, like a book
experimental procedure
  1. Pour a few tablespoons of either milk chocolate chips or the mini baking chips into the microwave safe container.  Put them in the microwave for ten seconds.  Take them out, stir them around with the knife, put them back in, and heat them for another ten seconds.  Stir again.  If the chips are runny at this point, continue to step 2.  If they aren’t, microwave them once more for ten seconds, stir, and then go on to step 2.  NOTE: It is important to only microwave the chips (whatever kind you are using) for a few seconds at a time, otherwise they will burn and stink and you will have to start over.
  2. Tear off a piece of tinfoil and spread it on the table.  Carefully pour the melted chocolate on the tinfoil.  What do you notice?  Are there bumps?  Are all of the chips melted, or are there still some that are in bigger pieces?  Spread the chocolate out so that it is in a fairly thin layer on the tinfoil, and then carefully put the tinfoil in the freezer or the ice chest.  Wait about five minutes, or until the chocolate is not runny.
  3. Carefully peel the chocolate off the tinfoil.  Save the tinfoil - you will need it again in a minute.  What do you notice?  Is all the chocolate the same color?  Is it all the same thickness?  This represents igneous rock.  Igneous rocks form when magma (melted rock from underground) cools.
  4. Break up your igneous rock (chocolate) into pieces.  Igneous rocks can, over time, erode, or break up, into pieces. Now, add some white chocolate chips (if you are using them) or some more of the mini baking chips (if you are using those).  A tablespoon or two of the chips is plenty.  
  5. Fold over the tinfoil on itself, so that the chocolate is between two layers of tinfoil.  Press down on the chocolate.  Sedimentary rock is formed when broken pieces of rock are compressed together over time.  Carefully peel back the tinfoil, and look at the sedimentary rock you have made.  How is it different from the igneous rock?  Is it the same in any way?
  6. Now, break up your sedimentary rock and put it back in the microwave safe container.  Heat it in the microwave again for ten seconds.  Stir, and heat it again for ten seconds.  Then, pour the chocolate onto the tinfoil again.
  7. This time, spread the chocolate out, fold the foil over on itself, and put a heavy book or something similar on the foil.  Let it sit for five minutes, and then put it in the freezer for five minutes.
  8. When time is up, take the foil out of the freezer and carefully peel it back. How is this chocolate rock different than the first two?  This is a metamorphic rock, which is made with heat and pressure.  Metamorphic means “changing”, and real rocks of this type have changed, due to heat and pressure.  Does your chocolate look like it has changed in any way?
what's happening
All rocks on Earth are made in one of these three ways - either by melted rock cooling (igneous), by pieces of broken rocks being compressed together (sedimentary), or by rocks being compressed and heated (metamorphic).  This is called the rock cycle, because a rock could start out as an igneous rock, be broken into bits by wind and water, be compressed and turned into a sedimentary rock, then be buried deep underground by an earthquake or other natural disaster, and then be changed into a metamorphic rock.  Scientists called geologists study the different types of rocks and can tell, just by looking at a rock, if it is igneous, sedimentary, or metamorphic, based on how it looks and where it is found.
variations and related activities
Since the rock cycle takes millions of years, it is much easier to model it with other things, rather than using real rocks!  Here are some other ways to understand the rock cycle and how it works.

This experiment is adapted from an experiment that we posted on our Facebook page July 17.  Here is the link to the original, from the Fernbank Museum:  https://youtu.be/7UDjqOe9arU

Here’s one that uses crayons:  https://littlebinsforlittlehands.com/crayon-rock-cycle

Here’s another one, using Starburst candy.  Notice - this one needs adult help, because it involves melting the candy:  https://lemonlimeadventures.com/edible-rock-cycle-for-kids/

This one uses either grated chocolate, or grated crayons (don’t do both together!):  https://www.mos.org/sites/dev-elvis.mos.org/files/docs/education/mos_geology-rock-detectives_diy-rock-cycle.pdf

references and links to more information
This article has simple, kid-friendly language about rocks and how they form:  https://www.ducksters.com/science/rocks.php

This article, from National Geographic, is very clear and concise. [NOTE: You might have to sign up for a free National Geographic membership to view this one]:  https://www.nationalgeographic.com/science/earth/inside-the-earth/rocks/

​
If you’d like to jazz it up, here is the same information in a rap song:  https://youtu.be/G7xFfezsJ1s

The Colorado School of Mines in Golden has a very cool museum, which teaches about geology in a number of neat ways.  Of course, they are closed right now, but they do have kits which are available for checkout, if you want to learn more!  Check it out here:  https://www.mines.edu/museumofearthscience/


Subject Tags
​
  • Geology​​

All Earth and Environment Science Subject Tags

All
Earthquakes
Geology
Volcanoes

Return to Main Menu
0 Comments

A Better Volcano

4/24/2020

2 Comments

 
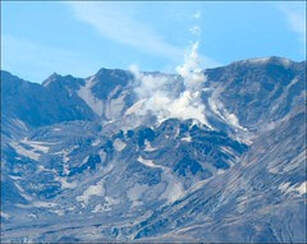
We have all made volcanoes with baking soda and vinegar.  But this volcano will teach you more about different things that come out of a volcano, and how they work together to build the volcano over time.
​
​NOTE: This is best done outside - it is very messy!!!
What You Will Need:
​
  • A plastic or paper plate 
  • A small bathroom cup - approximately 3 ounce size
  • Playdough
  • Baking soda
  • Vinegar
  • Molasses
  • Kitty litter
  • Optional - food coloring to make the lava red
Picture
Experimental Procedure:
​
  1. Put the bathroom cup on top of the plate.  Use the playdough to make a volcano shape around the cup.  This represents the volcano when it has just started to form.
  2. Put about a tablespoon of baking soda in the cup.
  3. Put a small handful (about ¼ cup) of kitty litter around the outside of the cup.  This represents one kind of lava that can be produced by the volcano. We will talk more about this in a minute.
  4. Pour about ¼ cup of molasses around the cup, and let it run down the sides of your volcano and onto the bottom of the plate.  This represents the other kind of lava.
  5. Now, pour the vinegar into the cup and watch where the bubbles flow.  After the mixture has stopped bubbling, notice the places where the bubbles popped in the kitty litter and molasses mixture.  What kind of surface do you see? If you were an ant walking on that surface, would it be smooth and easy to walk on, or bumpy and hard?
  6. Refill the cup with baking soda, add more molasses and kitty litter, and then erupt the volcano again.  What do you notice about the base of the volcano? Is it the same width as when we started?​​
What’s Happening?

When a volcano erupts, it spews out lava.  We all know this. But, not all lava is the same.  Some lava has more gas dissolved in it than other lava does, and so it acts differently when it cools.  Since these two different types of lava were first discovered in Hawai’i, they have Hawaiian names - aa (aah-aah) and pahoehoe (pah-hoy-hoy).

The kitty litter that you sprinkled around the volcano represents aa lava.  If you look at the kitty litter closely, what do you see? You should notice that kitty litter is made up of little chunks of material that are kind of sharp and pointy.  That is what aa lava is like, after it has cooled. It is sharp and pointy, and when you step on it, it sounds like glass breaking. Think of stepping on something sharp with your bare feet - you might say “Aah!”.  That is one way to remember aa lava.  

The other kind of lava is represented by the molasses.  When you poured the molasses out of the jar or bottle, you probably had a stream of it running down onto the volcano.  When you look at this stream more closely, you might notice that it is smooth and it flows easily. The other kind of lava that we are talking about, pahoehoe lava, acts more like molasses.  It flows smoothly, and cools into smooth, wavy patterns.

When volcanoes erupt, sometimes the lava that comes out is aa, and sometimes it is pahoehoe.  Sometimes, no lava at all comes out, and instead there will be ash, or even half-melted rocks!  But, whatever comes out of the volcano, when it stops moving, it becomes part of the side of the volcano.  Volcanoes actually grow every time they erupt! That is why your volcano is wider at the end of the activity than it was at the beginning.

Variations and Related Activities:

To actually see the buildup of gas pressure that leads to an eruption, put baking soda and vinegar in a zip-top bag, zip the top, and then put it on the ground and back up to watch it expand and pop.

Of course, it is also interesting to see how little baking soda it takes to make the volcano erupt, and if all the baking soda is used up in any one eruption.
Links to more information and activities:

Lava articles with photos of aa and pahoehoe lava:
  • https://en.wikipedia.org/wiki/Lava
  • http://www.sandatlas.org/types-lava-flows/

More interesting volcano facts:
  • https://kids.nationalgeographic.com/explore/science/volcano/

There is actually one volcano that scientists were able to watch being started!  To read more, and see some amazing pictures, go here:
  • http://volcano.oregonstate.edu/paricutin

You can also listen to the book Hill of Fire, and learn more about volcanoes on this Reading Rainbow episode:
  • S03E03 Reading Rainbow Hill of Fire .

​

Subject Tags
​
  • Geology
  • ​Volcanoes
​

All Earth and Environment Subject Tags

All
Earthquakes
Geology
Volcanoes

2 Comments

Graham Cracker Geology

4/21/2020

1 Comment

 
Hey, did you feel that?  Sometimes the earth moves under our feet unexpectedly, in a motion that we call an earthquake.  Also, sometimes a mountain that has been sitting there peacefully starts blowing its top all of a sudden.  There is a reason for both of these phenomena, and we can see why these things happen in a sweet experiment.
​
What you'll need:

  • Graham cracker​s
  • Icing
  • A plastic knife for spreading the icing
  • Red or yellow food coloring (optional)
Experimental Procedure:
​
  1. If you would like to have realistic colored icing for this experiment, mix in a few drops of red or yellow food coloring to make your icing look like magma (melted rock)
  2. Break your graham cracker in half.  It doesn’t have to break perfectly in half - all pieces work.
  3. Break one of your half graham crackers in half again.  Now you have one half and two fourths.
  4. Spread some icing on the half graham cracker.  Put a fair amount on there - you want to be able to smush it around easily.
  5. Put the two fourths of the graham cracker on top of the icing.
  6. Put the graham cracker sandwich that you have made down on a solid surface for this next part - it makes things easier to use two hands.
  7. Move the two fourths of the graham cracker apart from each other by sliding them on the icing.  This is called divergent movement.  This is what happens under the sea in places like the Marianas Trench.
  8. Move the two fourths of the graham cracker together, so that they tent up.  This is called convergent movement.  This is what causes mountains and volcanoes to form.  If you push down on your graham cracker pieces as you are also pushing them together, you might even be able to make the icing seep through the sides or the top of your graham cracker tent.  This represents what happens when a volcano erupts - hot magma bubbles up from underneath the volcano and comes out the top or the sides.  What is melted rock called when it comes out of a volcano? (lava)
  9. Move the two fourths of the graham cracker side by side so that the edges are rubbing on each other.  If parts of the graham cracker start to flake off or stick to each other, that is exactly what you want.  This is called transverse movement, and this is what happens when two plates (those things that make up the surface of the Earth) rub together.  They sometimes get stuck on each other, and pieces might break off.  That is what happens during earthquakes!
​
What's Happening?:

What you have just made is a simple version of what is happening inside the Earth all the time.  The bottom graham cracker represents the core of the Earth.  The icing represents the magma - melted rock that is in between the core and the tectonic plates.  The top graham cracker pieces represent the tectonic plates.  The tectonic plates (tectonic means things that happen on the surface of the Earth) float around on this melted rock and move in different ways, which we just demonstrated.  When the plates run into each other and push each other up, that is convergence, and it can cause mountains and volcanoes to form.  When the plates run side by side, sometimes they stick and slip.  The slipping is when earthquakes happen.  Of course, there are many other things that happen in the Earth’s crust, too, but this is a good place to start.


Variations and Related Activities:

Making a volcano - We have all made volcanoes with baking soda and vinegar.  But, you can take the process two steps further by making layers of different kinds of lava on your volcano.  Check out another Cool activity to make a volcano with simulated aa and pahoehoe lava.​
Links to more information and activities:

See where the latest earthquakes have happened, and what magnitude they were:
  • https://earthquake.usgs.gov/earthquakes/map/

Watch live webcams from Kilauea volcano in Hawai’i:
  • https://www.nps.gov/media/webcam/view.htm?id=5B6292AF-D3C2-CF49-C128FA9697DF00B6
  • Webcam (U.S. National Park Service)

Subject Tags
​
  • Earthquakes
  • Geology
  • ​Volcanoes
​

All Earth and Environment Subject Tags:

All
Earthquakes
Geology
Volcanoes

1 Comment
Picture
Picture
Picture
Picture
Picture
Picture
  • Home
  • Who We Are
    • History & Mission
    • Staff & Board
  • What We Do
    • Cool Science Festival (Schedule) >
      • Cool Science Carnival Day
      • Sponsors
      • Join the Festival >
        • Present a Carnival Day Activity
        • Host a Special Event
        • Volunteer Yourself
        • Volunteer Your Group
        • Contact the Festival
      • Previous Festivals >
        • 2024 Cool Science Festival
        • 2024 Cool Science Carnival Day
        • 2023 Cool Science Festival
        • 2023 Cool Science Carnival Day
        • 2022 Cool Science Festival
        • 2022 Cool Science Carnival Day
        • 2021 Festival
        • 2021 Carnival Day
        • 2020 Festival
        • 2020 (Virtual) Carnival Day
        • 2019 Festival
        • 2019 Carnival Day
        • 2018 Festival
        • 2018 Carnival Day
      • CS Cool Science Festival YouTube
    • Outreach Programs Overview >
      • Demonstration Shows >
        • Demonstration Shows: CO Science Standards
      • Hands-on Programs >
        • Hands-on Labs: CO Science Standards
      • Science or STEM/STEAM Days & Nights, Science Busking
      • Day of Science
      • Mobile Earth & Space Observatory
    • Big Cool Science Day at Colorado College
    • Kid's Mini Fruitcake Toss
    • Science on Tap
    • Calendar
  • Cool Stuff
    • Try Science At Home
    • Teaching Resources
    • Cool News
    • Cool Science Jokes
  • How To Help
    • Volunteer
    • Donate
    • Corporate & Foundation Donors
  • Contact Us
    • General Contact Info
    • Join Our Mailing List
    • Request A Program