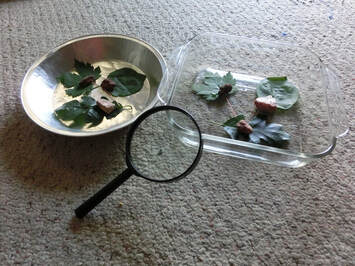
Click and expand the tabs below to get started. what you'll need
experimental procedure
what's happening
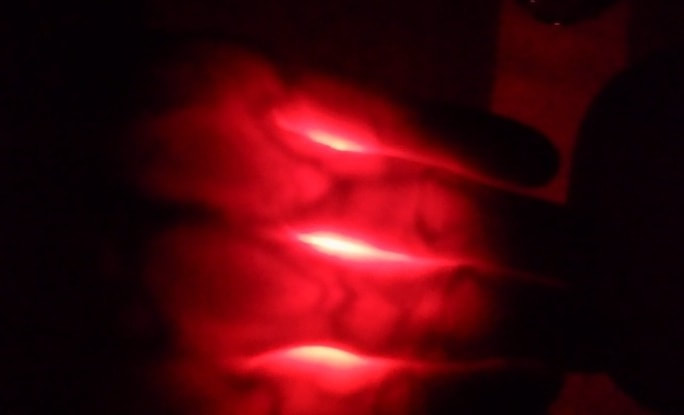
The light from your flashlight may appear white, but it is actually many different colors of light all mixed together, which your brain simply interprets as white. It's kind of amazing, but all of those individual colors just sort of disappear (at least as far as your brain is concerned), but they are all still there. When you shine this light into your hand most of the colors are either blocked or absorbed by your body, but the red light rays pass right through, which is why your hand appears to glow red (which, by the way, proves that there really was red light in your "white" flashlight to begin with). However, there is one part of your body where even these red light rays can't penetrate, and that is the blood in your veins. Since only veins absorb the red light they appear as dark lines inside your glowing red hand. Are you surprised that you can see your veins but you can't see your bones? It doesn't matter that bones are thick and hard, red light rays still pass right through them as if they aren't even there!
more detailed explanation
First a little background science. Light appears in many colors because each color has a different wavelength. We call this the visible spectrum, and a rainbow's colors show us the full spectrum of visible wavelengths or colors, from red which has the longest wavelengths (and therefore the least energy) through orange, yellow and green in the middle wavelengths to blue and violet which has the shortest wavelength (and the most energy), and least for the light rays that we can see. What we call "white" light is actually what we see when all (or at least most) of these wavelengths are combined together at the same time, but these individual colors can be separated in several ways. One way is to use a specially shaped piece of glass or plastic called a prism (see the PBS video link below), but actually the color of just about any object you see (like a red T-shirt, green grass, or a blue bicycle) is usually due to separating colors of light. When light from the sun, a lamp, or in this experiment your flashlight hits an object, any (or all) of three things can happen: some of the light- and more importantly, particular wavelengths- may bounce off the object (reflection); some may pass through the object (transmission); and some can be absorbed by the object (kind of like a sponge absorbs water). Normally we see most objects because of the reflected light that bounces off and into our eyes, so it's natural to assume that all light always bounces of objects, but in fact grass appears green because it absorbs most of the light which hits it. Only the green wavelengths of light bounce off and into our eyes. Most of the red, blue and other colors are actually absorbed by the grass. They literally disappear and never reach our eyes. By the way, the energy from this light which the grass absorbs is what the plant uses for photosynthesis. Glass, on the other hand, is usually transparent, which means that most of the light passes through it without any absorption. Imagine that you are standing inside a dark church admiring the beautiful colors of a stained-glass window as the sunlight outside the church passes through each of the colored panels. One panel looks red because mostly red wavelengths pass through the glass and into your eyes. The other wavelengths are either reflected at the surface or are absorbed by the glass. The same is true for any green or blue panels- only green or blue light passes through the glass. The other colors we see, like yellow, are due to mixing these three primary colors. [Color mixing is a fascinating subject, but we'll leave that for another experiment. If you're interested, check out the links below.] Now we're ready to talk about what's happening in your hand. Just as with stained glass, the various cells in your body (skin, muscle, bone, blood, etc.) can either reflect, absorb or pass (transmit) the various wavelengths or colors of visible light. As you might expect, most of the light (of all colors) bounces off your outer skin, but if you hold the flashlight very close, some of it will penetrate. Of the light which penetrates, most is quickly absorbed by various cells in your body, but a little bit of it can pass completely through some thinner parts of your body. That's why we need to do this experiment in a very dark room, and use a thin part of your body, like your hand or fingers. What's really cool is that red is the only color of light passes completely through your hand. That's why it appears red. All of the other colors are completely absorbed, either by the skin, bones, muscles, blood or other cells in your body. Most of the red light passes right through all of these cells except for blood cells- but not all blood cells. Red light passes through the blood in your arteries, but is absorbed by the blood in your veins. That's why your veins appear dark. Did you notice that red light even passes right through your bones? It's as though your skeleton has vanished! What's the difference between the blood in your arteries and veins? The answer is oxygen. Arteries carry freshly oxygenated red blood cells away from your lungs to replenish the other cells in your body. Once these red cells have given up most of their oxygen they return to your lungs in the veins to get more and start the process over again. When blood is fully oxygenated it's a very bright red color, but without oxygen it appears a much darker maroon color, and this darker blood in your veins easily absorbs most red light, thus no light passes through (i.e. absorption = dark). By the way, it's a well established myth that the blood in your veins is blue because it has lost its oxygen. While the veins which you can see near the surface of your skin do often appear to be blue, it is not because the blood inside them is blue. Human blood is never blue, although horseshoe crabs and some other animals do in fact have blue blood (see the reference links below). The actual reason that your veins appear blue is rather complicated, but it also has to do with absorption, transmission and reflection of different wavelengths of light (see links below for a more detailed explanation). A white flashlight works in this experiment because white light really contains all of the colors, including some red. It works even better if you use a red flashlight, since all of this light is red, and you will notice how much brighter your hand appears. If you use any other color flashlight, however, you won't see any light pass through your hand. Try it. variations and related activities
If you have a remote control for your television with buttons that light up when you press them you may have noticed that when you press a button (in the dark) that lights up red, it makes your fingertip glow bright red. However, if the button lights up green or blue, your finger doesn't glow at all. Now you know why.
references and links to more information
Bill Nye the Science Guy episode on light & color: Another PBS video on light & color: How is light absorbed, reflected or transmitted by different materials:
More about blood, arteries and veins:
Why do veins look blue if your blood is really red?:
Horseshoe Crabs do have blue blood: Egg candling:
A good place to buy cheap LED flashlights in different colors:
Return to Try Science at Home
0 Comments
Click and expand the tabs below to get started. What you'll need
experimental procedure
What's Happening
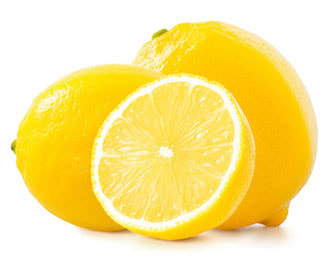
Scientists sometimes dissect, or cut apart, an organism in order to see how it is put together and how it works. When we cut apart a lemon, we can see that it has many different parts, and that all of those parts work together to keep the lemon healthy and living. The exocarp protects and heals the lemon, the pedicel connects the lemon to the branch of the tree, and the vesicles contain the fluid of the lemon. Can you think of any ways in which these parts of a lemon are similar to parts of your body? variations and related activities
Of course, now that you have a cut lemon right there in front of you, there are several things that you can do with it. You could make yourself a nice, tall glass of homemade lemonade - no powder needed! Just squeeze all the lemon juice into the glass, add water and as much sugar as you need, and drink up! But, there are also other things to do! You can use the juice of a lemon to make your own invisible ink for secret messages. Just squeeze some lemon juice into a little cup (you can also use bottled lemon juice), then use a Q-tip swab or small paint brush to write a message with this juice on a piece of plain paper. Let it dry completely and you shouldn't be able to read the message- it's invisible. To reveal the message you must know the secret: heat. With the help of a grownup carefully hold a warm iron above the paper for a few seconds until the message magically appears. You can also carefully hold the paper above a toaster (don't burn your fingers!), or sometimes a hair dryer will also work. What's happening is that the acid juice of the lemon soaks into the paper and damages the fibers a bit. When you heat the paper carbon atoms from the sugars in the juice that was absorbed begin to react with oxygen from the air and actually cause it to burn a little bit or oxidize, turning it brown. The reference links below explain this experiment in more detail if you want to give it a try. You can make a mini flame thrower out of a lemon peel and a candle! If you want to try this make sure that you have adult supervision to help you light a candle and set it on a table or something to hold it steady. Now cut off a piece of the peel (just the exocarp and some of the albedo, not the fruit inside), then hold it between your thumb and index finger with the exocarp facing away from you. Move it near the candle but not too close, then give it a little squeeze. You should see the flame explode a little (watch the video link below). The peel of citrus fruits, including your lemon, contains an oil called limonene which is the main chemical that gives citrus fruits their citrus-y smell. It's what you've probably squirted in you eye before, and it stings. It is also flammable, and that mist of oil instantly ignites as it hits the candle's flame. You can also use the lemon’s limonene oil to burst a balloon! Just squirt some of the lemon oil from the exocarp, just as described for the mini flame thrower above, onto an inflated balloon and POP! This happens because the limonene oil in the peel can dissolve the latex rubber in the balloon. This makes the balloon weaker, so it pops! If you try this we should warn you that some balloons may be much more difficult or even impossible to pop this way. That's because they have a different type of rubber or have been processed a little differently that makes them stronger. The video reference link below explains this very nicely. We have found that the cheap little balloons made for filling with water (sometimes called water bombs) work really well for this experiment, and if you do it outside with a water balloon it's even more fun when it pops! Will other citrus fruits (grapefruit, orange, clementine) work? Experiment and find out! Another interesting experiment is a variation on the classic Cartesian Diver Bottle. This fun little project is usually made with a ketchup packet, a plastic pipette or pen casing, a bit of a straw or even a small balloon (we'll have our own version as a new activity page soon, but for now check out the reference links below). You can also make a diver using a piece of a lemon peel. Just cut a little sliver of the peel (just the exocarp and a little of the albedo) and drop it into an empty plastic soda or water bottle. Fill the bottle completely to the top with water (make sure there is no air left in the bottle) then screw on the lid tightly. The lemon peel should float to the top of the bottle, but when you squeeze the bottle (you might need to squeeze really hard) the peel will sink. If you stop squeezing it will float to the top again. If you're lucky you may be able to repeat this for a few minutes until the peel eventually sinks to the bottom and stays there. You may need to experiment a bit to get just the right size and thickness piece, and you might need to try a fresher or different lemon- it can be finicky. What's happening is that the little pores on the outside of the exocarp trap some air, and this makes the peel less dense than the water and it floats. When you squeeze the bottle, however, the water inside pushes into these little pores making the peel more dense so it sinks. Eventually the air in the pores will escape as tiny bubbles (look closely and you may see them) and the peel can't float any more. references and links to more information
Some helpful diagrams and labels of parts: Another way to make a mini flamethrower: Popping a balloon with an orange peel :
Make invisible ink with your lemon juice:
Some other Cartesian Diver Bottle variations:
Make lemon curd and eat it on your toast:
Return to Main Menu
Click and expand the tabs below to get started.
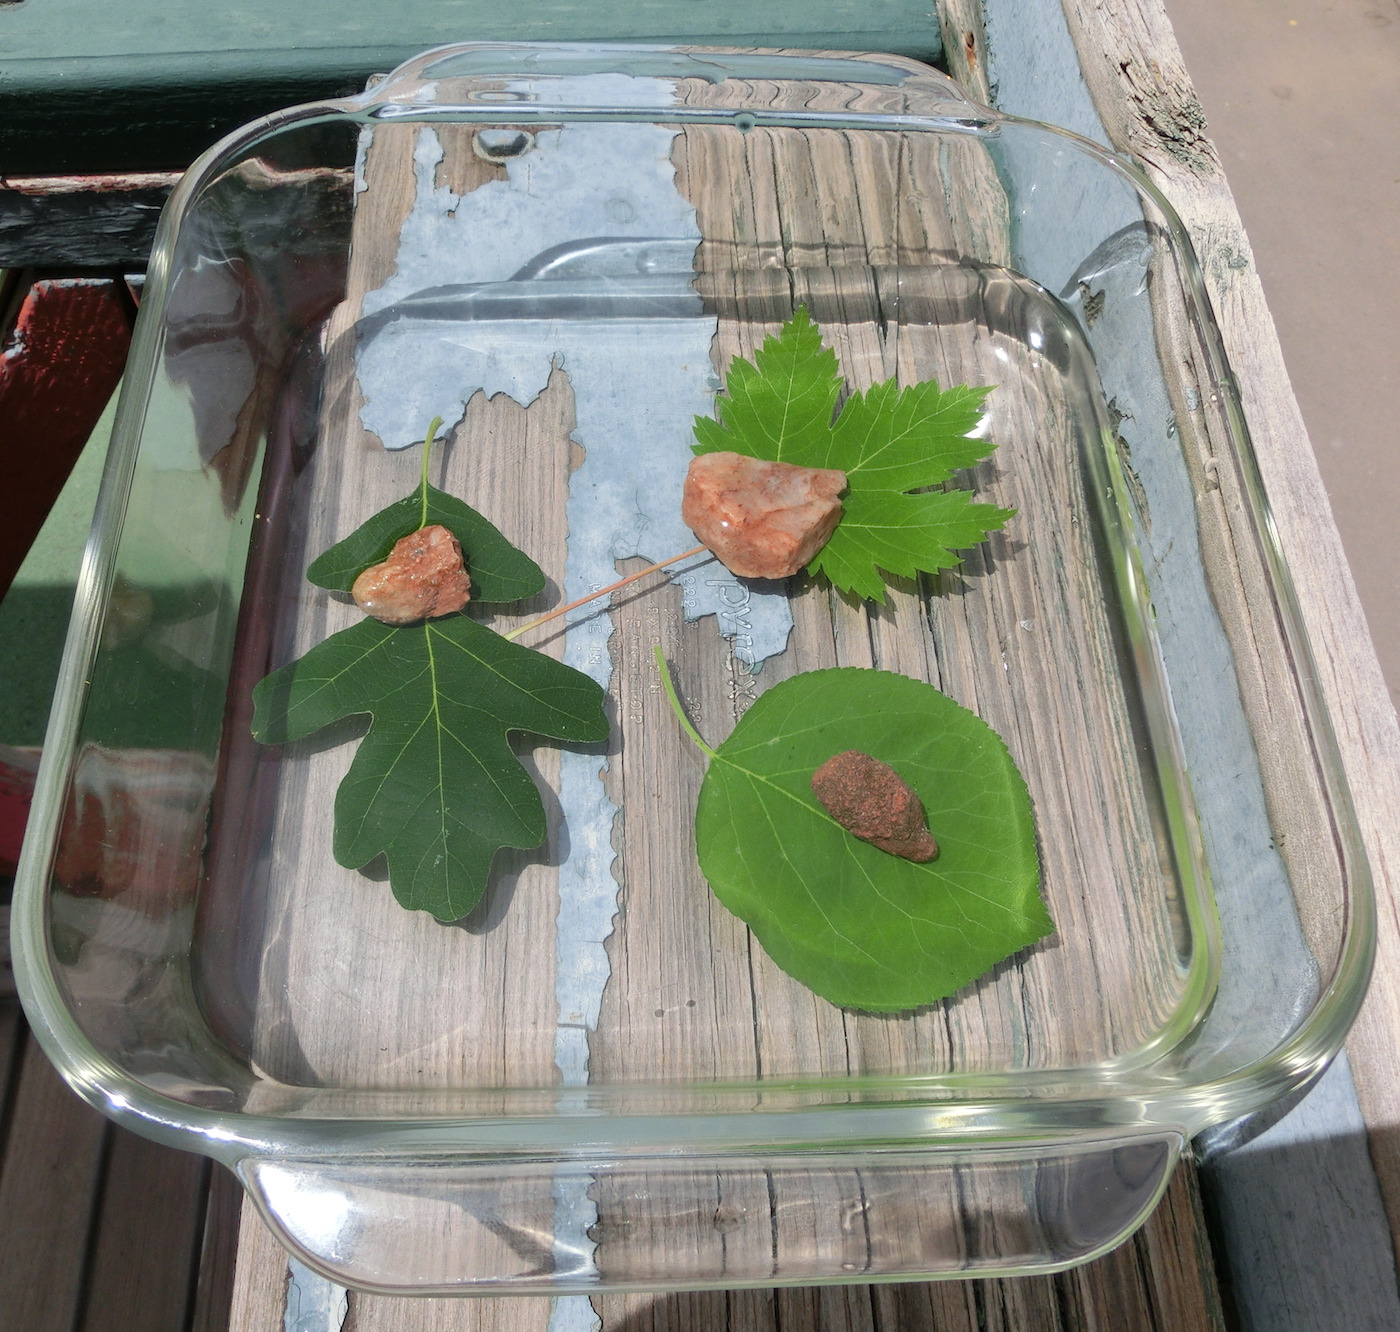
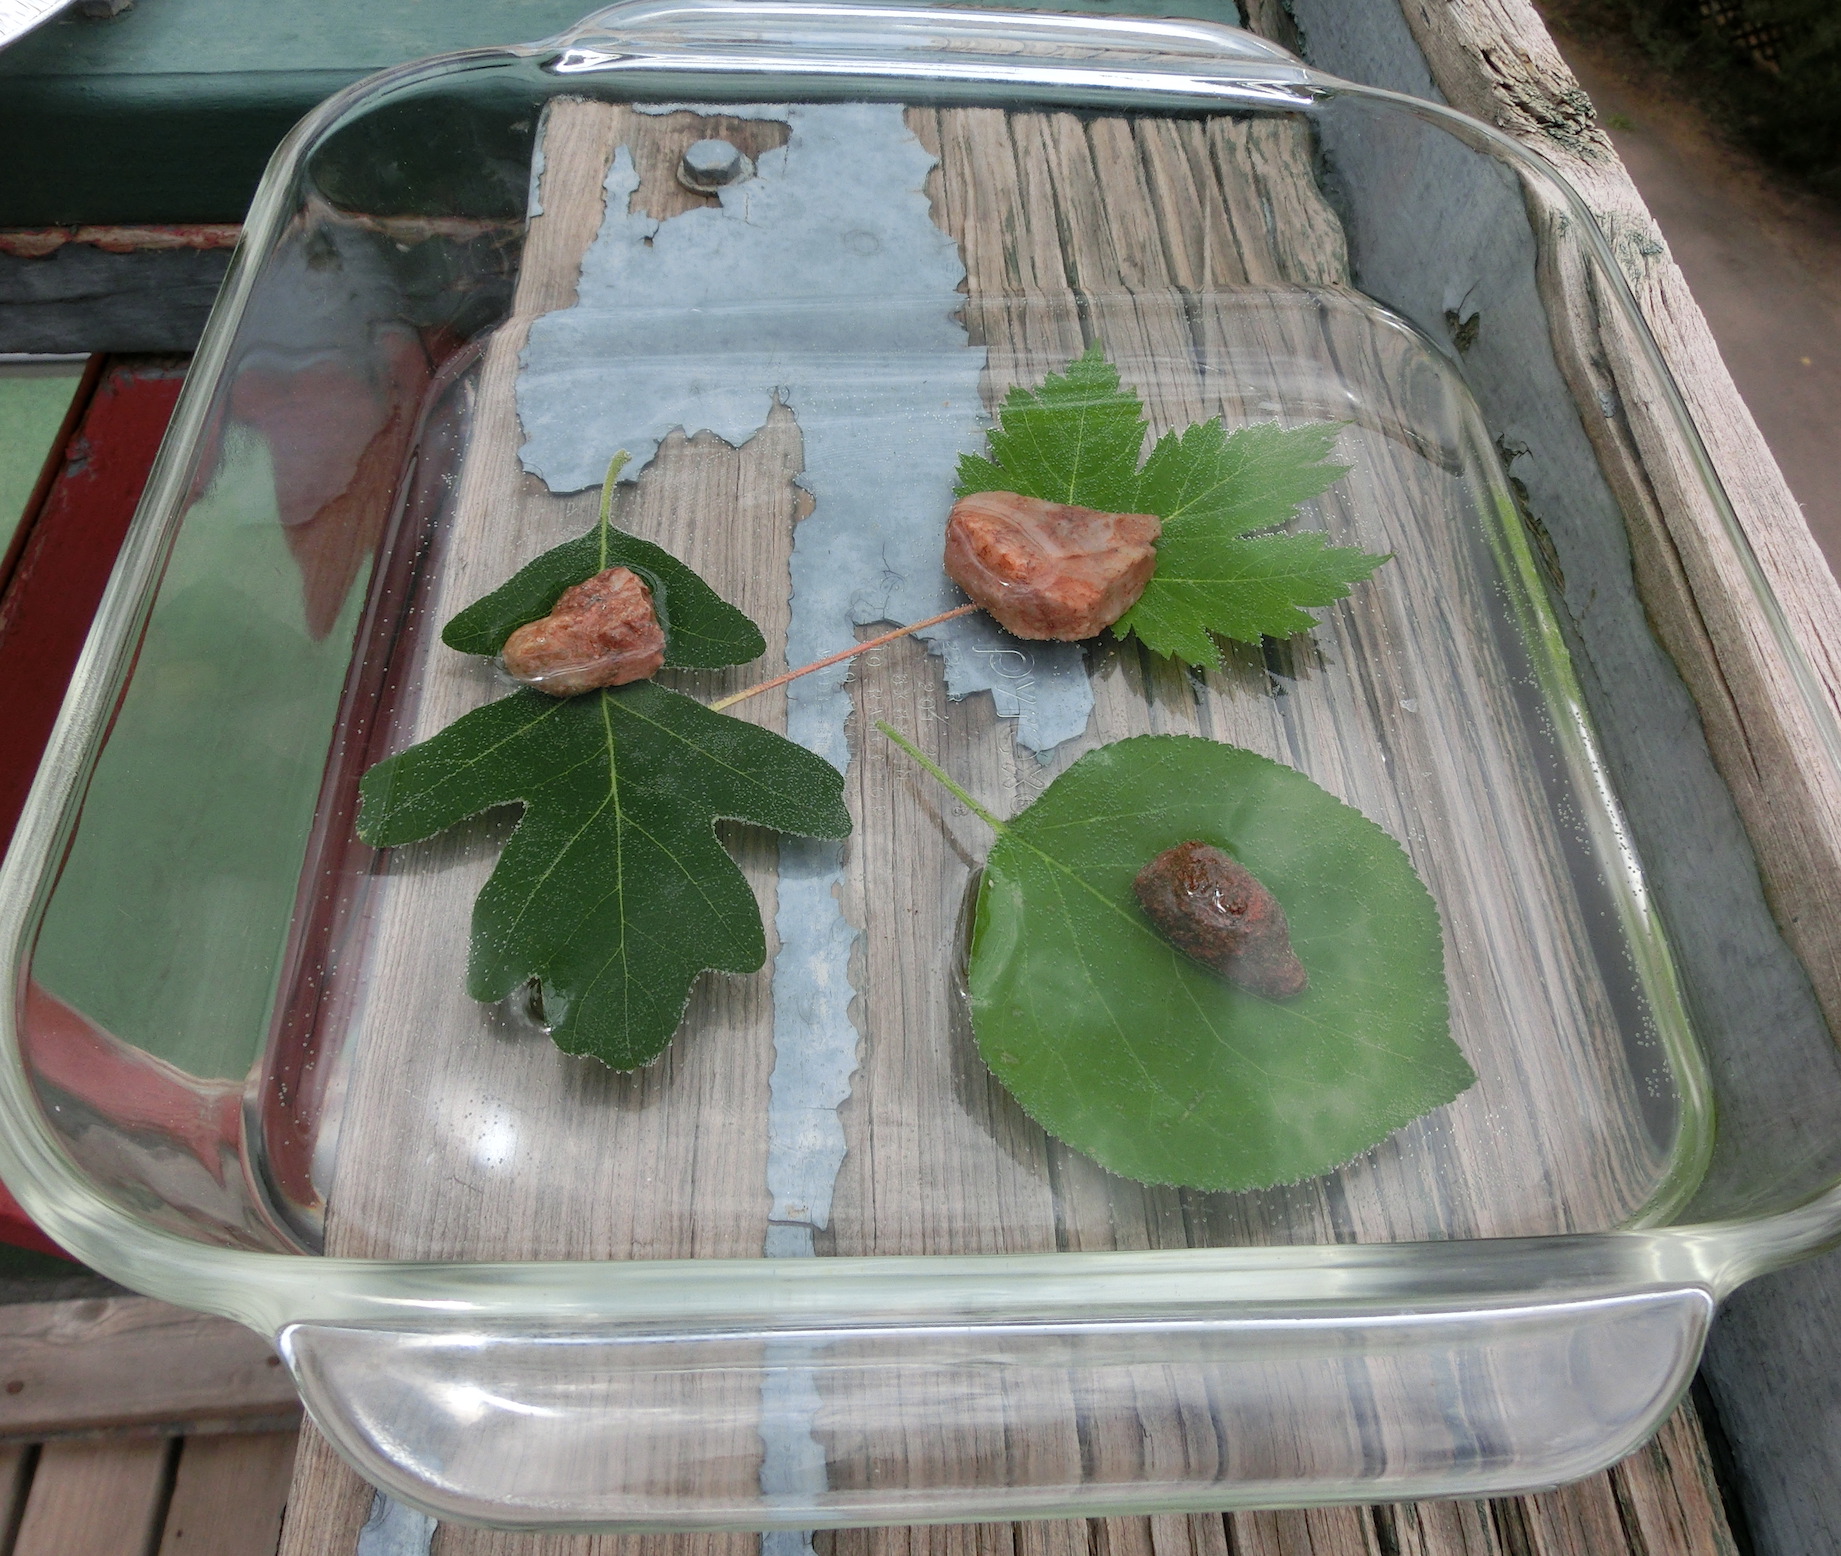
Experimental procedure
what's happening
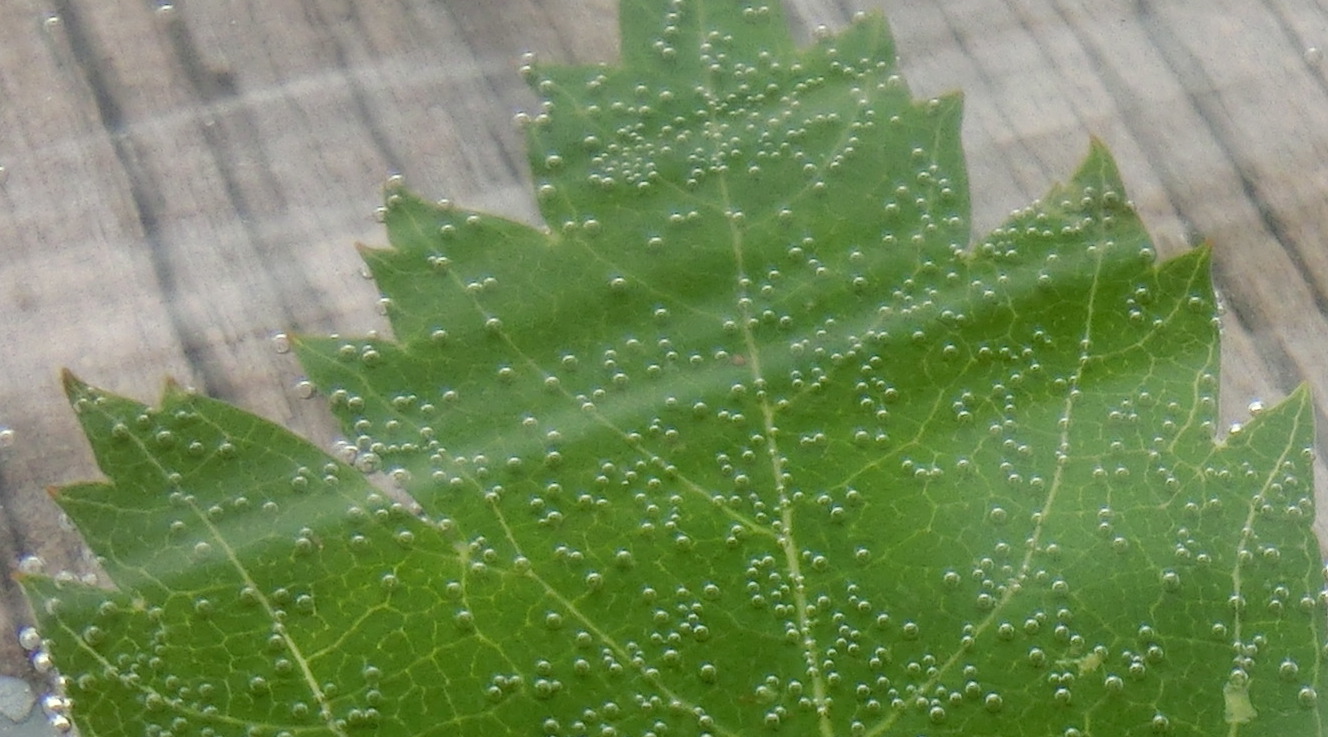
Trees and other plants need to "breathe" air and "drink" water in order to grow, just as we do, but when the sun shines on them they can do something that we can't do. It's an amazing chemical reaction called photosynthesis. Cells in the plant's leaves get carbon dioxide gas molecules, or CO2, from the air, and water molecules, or H2O, from their roots. These cells also contain special structures called chloroplasts which in turn contain a chemical called chlorophyll, which is the pigment that gives the leaves their green color.
The chlorophyll in chloroplasts can absorb sunlight and use its energy to split apart the hydrogen (H) and oxygen (O) atoms of H2O molecules (just like you might use your energy to break apart the individual pieces of a Lego car). Another part of the cell breaks apart the carbon (C) and oxygen (O) atoms of CO2. Now the cell can use some of these H, C and O atoms to rebuild new molecules called carbohydrates (just like you could build a new boat or plane with the Lego pieces from your car). Some common carbohydrates made by plants include glucose (used for energy), cellulose (used for building leaves and stems) and starch (used to store extra energy). After building these new carbohydrate molecules it turns out that there are some extra oxygen atoms left over, which simply escape through the leaves, just like we exhale when we breathe. We breathe in oxygen and exhale carbon dioxide, while plants breathe in carbon dioxide and exhale oxygen during photosynthesis, thus we need each other to survive. [Plants can also breathe in oxygen and exhale carbon dioxide and water, just like we do. This process is called plant or cellular respiration.] If you look closely at your leaves that were in the sunlight, you should see lots of very tiny bubbles. These are the escaping oxygen atoms which form bubbles since they are under water. If you look closely at the leaves that were kept in the dark, however, you won't see any bubbles. This shows that without sunlight the plant does not have the energy it needs for photosynthesis, thus it can't split apart the atoms of the H2O molecules and there are no oxygen atoms to escape through the leaves.
variations and related activities
references and links to more information
These links will get you started on your own internet search to learn more
Learn more about photosynthesis and chlorophyll:
Learn more about plant and leaf science (botany):
Learn about plant cells:
More experiments with plants and cells:
Identifying plants and trees by their leaves:
Learn more about carbohydrates:
Click here to ask a question or leave a comment |

|
|

|

|

|

|

|