|
What happens if you chew gum and chocolate at the same time? You'll find out in this sweet candy science experiment while learning an important concept in chemistry: solubility. Click and expand the tabs below to get started experimental procedure
what's happening
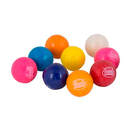
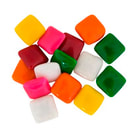
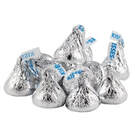
This is a chemistry experiment, even though you are doing it in your mouth! It illustrates a very important concept in chemistry called solubility, which is the ability of one substance to dissolve another substance. Chemists say that “like dissolves like” and this is an example of that. If your gum was candy coated, like a Chiclet or gum-ball, you should have noticed that the candy coating dissolved or disappeared as soon as you began chewing. This is because the candy coating was made of sugar, which easily dissolves in water (try adding a spoon full of table sugar to a glass of water and watch what happens), and the saliva in your mouth is mostly water. Chemists would say that sugar is soluble in water. Saliva and chewing are the first steps in digesting or breaking down your food into simpler components that your body can use for energy. Your saliva does not dissolve the gum, however, because most modern chewing gums are made of a synthetic rubber (i.e. man-made, not natural), which is a type of oil-based polymer, such as butadiene-styrene, vinyl acetate, or polyethylene (the same material in plastic grocery bags). You may have already learned that oil (as well as oil-based substances) and water don't mix- they are not alike. But chocolate does contain oil-based fatty substances, so the chocolate dissolves the gum. Like dissolves like. After adding the first piece of chocolate and chewing you should have noticed that the gum was much softer and stickier, and maybe much smaller than it was after you first chewed the gum alone. If you add enough chocolate to the gum in your mouth (you may need 3 or 4 pieces) and continue chewing you should be able to make the gum disappear completely! variations and related activities
If you're not allergic to peanuts, try chewing a spoon full of peanut butter with your gum instead of chocolate. Does the peanut butter also make the gum disappear? Why do you think that is? Instead of doing the entire experiment in your mouth, just chew the gum for a minute or two in your mouth, then put it in a cup or small bowl instead. Add a couple spoonfuls of vegetable oil to the cup and use a spoon to stir and grind the gum. Does it dissolve? If not, add a little more vegetable oil. Try repeating ths experiment with some other liquids. Is gum more or less soluble in other liquids? Solubility has it's limits, however, and you can easily test this. Add one or two spoonfuls of sugar to a glass of water and observe what happens. Does all of the sugar dissolve immediately? Observe for a minute or two, has more dissolved? Use a spoon tp stir the water and sugar. Does it dissolve more easily? Try adding more spoonfuls of sugar and stirring. Does the sugar continue to dissolve? Keep adding sugar until it will no longer dissolve in the water. Now you have reached the solubility limit- the water simply can't hold any more sugar and we say it is saturated. What would happen if you added more water to the glass? Solubility also depends temperature. With the help of an adult try repeating this experiment with warm or hot water. Is sugar more soluble in hot water, i.e. can you make more spoonfuls of sugar dissolve? Coming soon: make rock candy float letters off M&M's pop rocks dancing raisins carbonated soft drinks Lava Lamps Dissolve egg shell in vinegar Underwater fireworks (food coloring dissolves in water but not oil) Oil-based and water-based paints references and links to more information
Journal of Chemistry Education Classroom Activity #105. A Sticky Situation: Chewing Gum and Solubility Learn more about solubility: Coming soon: Saliva Digestion Solubility experiments
Return to Try Science at Home
1 Comment
Click and expand the tabs below to get started. experimental procedure
what's happening
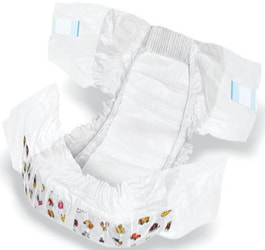
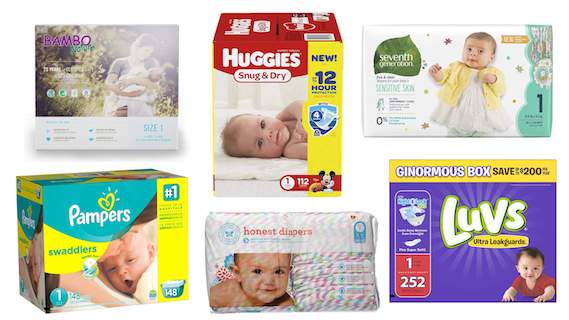
Modern disposable baby diapers contain a small amount (4-5 grams) of polyacrylic acid in a powder form (sodium polyacrylate), which is mixed into the fluff in the middle layer of the diaper. The inside layer of the diaper allows water to pass through it into the absorbent middle layer, and the outer layer is waterproof, so both baby and mommy stay dry. Polyacrylic acid can absorb about more than 100 times its own weight in water, which is why an average sized diaper can absorb up to 16 ounces of water. Luckily that's more than a baby usually pees.

Why is this powder so good at absorbing water? Polyacrylic acid is a polymer made from the monomer acrylic acid. Polymer molecules are kind of like long chain made up of lots of identical links (the monomers). Polyacrylic acid chains contain thousands of monomer units, as well as cross-linking between different molecule chains, which makes them kind of tangle together. Most polymers, such as polyethylene and polystyrene (used in trash bags, plastic bottles, and Styrofoam®, for example) are hydrophobic, meaning they repel water. Polyacrylic acid, however, is very hydrophilic - it attracts water- because of the carboxylic acid groups (COOH) in the polymer, which can hydrogen-bond to water molecules. The cross-linking also helps trap lots of bonded water molecules inside the tangled chains.
Variations and related activities
You can make this activity more colorful by adding a few drops of food coloring to the water. Also try adding some table salt to the water. What happens? [Table salt is sodium chloride (NaCl) and the chloride ions will bond with the SAP and prevent water molecules from doing so.] If you place the wet polymer on a towel or napkin and allow it to dry out for a few days it will dehydrate and shrink back to almost its original powder form and can be used over an over again. Polyacrylic acid, often just called baby diaper polymer or super absorbent polymer (SAP), comes in many forms and has many other applications. SAP is often used to clean up hazardous waste spills- even more hazardous than what ends up in a baby diaper! Just sprinkle the dry powder on the spilled liquid and then sweep or vacuum it up. You can also find SAP in moisture-control potting soils at a garden store. If you over-water your plants the SAP will absorb the excess water. As the soil dries the SAP dehydrates and the excess water returns to the soil, maintaining just the right amount or moisture for the plant to thrive. You can also buy headbands and neckbands that contain SAP inside, after you wet them the water evaporates slowly and keeps you cool for a long time (see the reference link below to make your own!) You can buy Instant Snow powder from many stores online (see references below). Instant snow is exactly the same material, it's just ground up into a much finer powder. This causes it to form smaller molecular structures and puff up instantly when it absorbs water, giving it the look and feel of real snow. It's often used in movies when they want snow in a scene without the need for cold temperatures- and the wet mess when it melts! Orbeez and other water beads are clear spheres and other fun shapes made from the same polyacrylic acid SAP material, but prepared a little differently to form the shapes you see when they absorb water. Typical Orbeez spheres start as 3 or 4 mm beads, but can grow to more than 1" in diameter as they absorb water. Because they are composed almost entirely of water when fully grown, they are essentially invisible in a bowl of water (as long as both the spheres and the liquid water are clean). Water is water. The index of refraction (a measure of how light bends as it passes through a material) of the liquid water is the same as the water in the sphere, so light rays are not refracted as they pass from the water in the bowl to the water in the beads, and the spheres are therefore almost completely indistinguishable from the rest of the water. They also bounce (but can break if you bounce them too hard) and act as little magnifying glasses. Just as with the baby diaper polymer, you can add food colors to make colored Orbeez, and if you let them dry they will shrink back down to little beads that you can use over and over again. references and links to more information
The science of sodium polyacrylate and SAP's:
Here are some other ways to do this experiment:
This video from Science Beyond at the St. Louis Science Center shows you the secret behind one of our most popular demonstrations: Fun with Instant Snow powder: Orbeez!: Make your own cooling headband or neck bandana with SAP:
Return to Main Menu
Click and expand the tabs below to get started what you'll need
basic procedure
making giant bubbles
what's happening
Did you know that water molecules are actually very sticky? You've probably seen them clinging to lots of surfaces like walls, windows and tables. When one material sticks to another we call it adhesion, and water molecules adhere or stick to many other materials, but they also like to stick to other water molecules. When a material sticks to itself we call it cohesion. If there is no good surface around for water to stick to it's perfectly happy sticking to itself by pulling on several other water molecules nearby. In fact, each water molecule pulls so hard on the others around it that all of the water tries to pull itself into one tight spherical ball if it can't find anything else easier to stick to. This force is sometimes called surface tension. Pour some water onto a freshly waxed car or tabletop and it forms lots of little droplets or "beads" because it can't stick as well to the waxy surface (check the video link at the end to see what water does on the International Space Station). If you pour it on most other surfaces, however, it will spread out if it can stick to those surfaces. Okay, so what's all this have to do with soap bubbles? A bubble is like a balloon, with a thin film or skin on the outside surrounding and trapping air (or some other gas) inside. Water doesn't stick to air though, leaving only other water molecules for it to stick to, but the surface tension of water, or the force with which it pulls on other nearby water molecules, is so strong that it will form small beads full of water (like raindrops) rather than stretching into a thin film. If we want to stretch water into a thin skin to make a bubble we need to add something else that it would rather stick to, and that's exactly what soap does. Soaps and detergents are usually long snake-like molecules with one end (let's call it the head) that likes to grab or pull on water molecules while the other end (tail) likes to get as far away from water as possible (or if possible grab something very different like oil or grease, which, by the way, is what makes them so good at cleaning dirt). The head ends of soap molecules in your bubble solution grab onto water molecules, but since their tail ends want to get out of the water at the same time, they can only grab one side so that their tail ends can remain in the air. Other soap molecules can also grab onto the same water molecules but from the opposite side, while also keeping their tail ends in the air. This leaves the water molecules free to grab some other water molecules, but only in a region where there is no soap, forming a thin three-layer film skin. You can think of these three layers sort of like a peanut butter sandwich, where the pieces of bread on the top and bottom are the soap layers and the peanut butter inside is the water. The surface tension of the water layer inside gives the skin of your bubble its strength, while the soap layers above and below weaken the surface tension just enough to allow the water to stretch out into a thin film so that you can blow a bubble. Materials like soap that reduce the surface tension of water (or other liquids) in this way are called surfactants. The soap-water-soap film may be strong enough to form a skin of a bubble but it's also very, very thin- thinner than the hair on your head- so there is a limit to how big a bubble you can make with just the cohesive force of water holding it together. Making it any bigger and the skin will break, popping the bubble. The guar gum (or cornstarch) you added to the water gives it extra strength to make even bigger bubbles. The baking powder also helps by controlling pH or acidity of the solution. You may have seen some soap bubble recipes that add glycerine to the soap, which works by slowing the evaporation of water (although most bubble experts agree that recipes like ours work much better). Reference links at the end explain in more detail how these ingredients work. variations and related activities
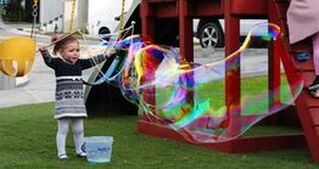
Try blowing a small bubble inside one of your big bubbles. To do this get as close as you can to the big bubble without touching it, then gently blow a puff of air into the wall of the bubble (see the video). Why do bubbles pop? Remember that the skin of a soap bubble is very thin, and it's only the water layer which really holds the bubble together as the soap layers on either side actually weaken the water's cohesive forces or surface tension. As the layer of water evaporates the skin of the bubble gets thinner and thinner until the water molecules can no longer hold onto each other and the bubble pops. Do you think your bubbles would last longer on a hot and dry day, or a cool and humid day? Of course a bubble also pops when you touch it- that is if you touch it with your dry finger or something else that draws the water out of its film just like evaporation does. If you dip your finger or hand into the soap solution you should be able to carefully push it through the skin of the bubble and pull it back out without popping it. You can even catch and hold a bubble in your hand (as long as your hand is completely wet- touch it with any dry skin and it will pop. How can a triangle or square shaped bubble wand still make spherical (ball-shaped) bubbles? Once you release your bubble from the wand you may have noticed that it quickly formed a more spherical shape. This is because a sphere is the most stable shape for a bubble, allowing it to enclose the most air while using the least amount of soap (mathematicians might say enclosing the maximum volume with the minimum surface area). Huge bubbles have a large amount of water in their skins, however, and as gravity pulls on this water (as well as any wind blowing on the bubble) the relatively heavy skin gets tugged quite a bit, which is why the bubble wobbles and changes shape a bit as it moves, but it still tries to remain mostly spherical. Did you also notice how colorful your bubbles are (look at the photo above)? In fact, the different colors form rainbow-like stripes that circle around the bubble (although the colors here are formed in a different way than they are in a rainbow). These colored stripes are called interference fringes and caused by light rays reflecting off the thin soap-water-soap film of the bubble. Some light rays reflect off the outside surface of the film and back to your eyes while others pass through this surface, into the film itself, and then reflect off the inside surface and then back to your eyes. When these various light rays recombine on the way to your eyes we say that they interfere with each other. This also happens when light rays strike a pane of window glass, but the soap film of the bubble is much, much thinner. In fact, the thickness of the soap film is close to the wavelengths of light, so that this interference creates colored bands as the thickness of the film changes, which is why the colors change as the bubble slowly evaporates and its skin gets thinner (check out the references at the end to learn more about the physics of light). Gravity also pulls the water in the bubble downward, so that it's skin is thicker near the bottom. Thus the fringes or bands of color indicate changes in film thickness similar to how the lines on a contour map indicate elevation changes. references and links to more information
Just about everything you ever wanted to know about soap bubbles:
How does soap work, and what is the difference between soap and detergent?:
Experiments and other activities with surface tension and soap:
Surface tension of water in space: Why are bubbles round?:
Colors in soap bubbles (and rainbows, just for fun):
What you'll need
experimental procedure
what's happening
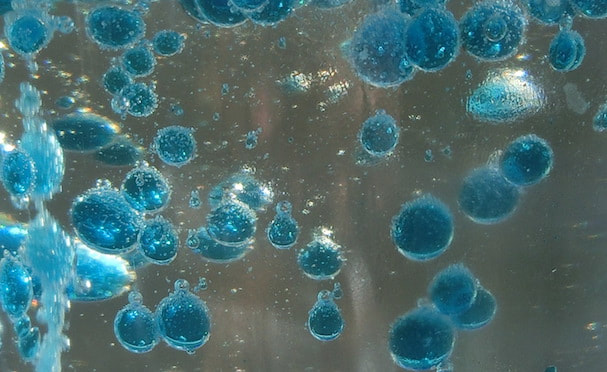
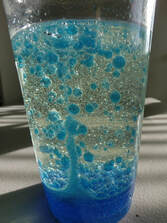
You may have heard someone say that water and oil don't mix. The molecules (the arrangement of atoms that make up these chemicals) that make up water are very different from molecules that make chemicals like vegetable oil. Water molecules (or H2O) attract other water molecules and oil molecules can (weakly) attract other oil molecules, but water molecules strongly repel oil molecules, kind of like the way magnets repel each other if you point the north pole of one towards the south pole of the other. Thus when you add oil to water they will separate into different layers, and the oil layer will float to the surface because oil is less dense than water. This is the scientific term which means that a cup of water has more mass (and is therefore heavier) than the same cup filled with oil. The force that causes the oil to float above the water layer is called the buoyant force or just buoyancy. Since the food coloring is dissolved in water, these drops also will not mix with oil and sink to the bottom of your cup where they burst and mix with the water to color it. The solid Alka-Seltzer pieces are more dense than the oil or the water, so they sink all the way to the bottom. As soon as they reach the water they begin to dissolve and a chemical reaction takes place between two of the ingredients that produces carbon dioxide gas bubbles. As these bubbles rise they pull some of the water along with them and have enough buoyancy to rise through the oil layer, but once they reach the surface the bubbles pop and the gas escapes. Now the water droplets are too heavy to float, and they fall back through the oil where they may pick up another gas bubble to rise again. This process resembles the rising and falling bubbles in a Lava Lamp, but it works a little differently. A real Lava Lamp also contains two immiscible liquids (i.e. they don't mix) with different densities, but it uses the energy from a light bulb underneath to warm the lower liquid. As it warms it expands and its density decreases, allowing bubbles to rise up through the upper liquid. As these bubbles float higher (and farther away from the heat source) they cool down, become denser once again, and fall back into the lower layer where the process can repeat. The upper liquid also warms during this process, but it was carefully chosen so that its density does not decrease as much, so that it still provides enough buoyant force to push the bubbles from the lower liquid upwards. See the reference link below for a more detailed explanation. variations and related activities
references and links to more information
Alternative Lava Lamp experiments:
How real Lava Lamps work: More about the differences between and oil and water molecules:
Try some cool density column experiments:
More about density and buoyancy:
More cool buoyancy experiments:
Click and expand the tabs below to get started. experimental procedure
What's happening
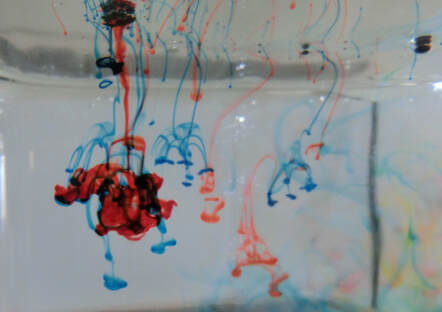
You may have heard someone say that water and oil don't mix. The molecules (the arrangement of atoms that make up these chemicals) that make up water are very different from molecules that make chemicals like vegetable oil. Water molecules (or H2O) attract other water molecules and oil molecules can (weakly) attract other oil molecules, but water molecules strongly repel oil molecules, kind of like the way magnets repel each other if you point the north pole of one towards the south pole of the other. Thus when you add oil to water they will separate into different layers, and the oil layer will float to the surface because oil is less dense than water. This is the scientific term which means that a cup of water has more mass (and is therefore heavier) than the same cup filled with oil. The force that causes the oil to float above the water layer is called the buoyant force or just buoyancy. Since the food coloring is dissolved in water, it also will not mix with oil and sinks to the bottom of your cup. When you gently pour the oil and color droplets from your cup onto the surface of the large container they first mix with the rest of the oil floating on the surface and the color droplets start to sink. As they reach the bottom of the oil layer they cling there for a few seconds until they can finally break through into the water below. Once they make it into the water the food color droplets can begin to dissolve, and because they are just slightly more dense that the rest of the water (the food coloring chemicals give it a little more mass) they slowly sink and create the beautiful color streaks that look sort of like fireworks exploding in slow motion! variations and related activities
What difference does it make if you use hot water instead of cold water? For a bigger "explosion", try carefully adding a drop of food color directly to the oil puddle on the surface, but don't get too much color in the water or you won't be able to see what's happening. You can learn more about density and buoyancy by making a density column, where several different (usually colorful) liquids are carefully poured into a tall container where they separate into many layers. Check out the links below to try this experiment for yourself. There are several other fun activities and experiments which demonstrate buoyancy, like the Cartesian Diver bottle and Dancing Raisins. See the links below to have some fun. references and links to more information
More about the differences between and oil and water molecules:
Try some cool density column experiments:
More about buoyancy:
Try some cool buoyancy experiments:
Experimental Procedure:
What’s Happening: The science behind this is actually rather complex, and is explained in much greater detail in our Instant Freeze Super-Cooled Water lab. Basically, when salt (or anything else) is dissolved in water it lowers the freezing point of the salt-water solution below that of pure water alone. In other words, when you put the salt and the ice together, you are making a solution that can get much colder than 32 degrees Fahrenheit (the normal freezing or melting temperature of pure water) and still remain liquid. This is called freezing point depression, and it can be very useful when you are trying to get something else really cold (in this case, the ice cream). Freezing point depression is also why the milk or cream needs to be much colder than 32°F before it will freeze; milk is mostly made of water, but with a lot of other stuff dissolved in it, and that lowers its freezing point too. As you shake the big bag, sloshing around the smaller bag inside, the super cold salt-ice-water solution in the big bag takes heat away from the cream/milk inside the smaller bag, lowering the temperature enough for it to freeze. You should also notice that this heat flowing out of the small bag melts even more of the ice in the big bag- it gets sloshier as you shake it. Of course heat from your hands does the same thing (and you might want to wear gloves as you shake the bags). It's very important that you shake the bags vigorously while the milk/cream is freezing. This breaks up the ice crystals that are forming inside the smaller bag and keeps your final ice cream smooth and creamy- just the way you probably like it. If you don't shake the bags, as these ice crystals form they will stick to each other and you'll end up with a hard frozen block of milk instead- a milk-sicle! Try it by placing another Zip-Lock bag or cup of milk in your freezer to see what happens. Variations and Related Activities: Here's another way to make ice cream, which uses the same ideas, but slightly different materials:
You can play around with many different ways to make ice cream. What if you used skim milk? 2% milk? A combination of the two? Does it take longer for them to freeze? What if you used chocolate milk? Do you prefer richer ice cream (made with pure cream), or not-so-rich ice cream (made with Half and Half)? What about ice milk (which is ice cream made with milk and no cream at all)? Which tastes the best? Another way to do this is to get two metal cans (coffee cans work well). One should be able to fit inside the other, with room for the ice and salt. It should also have a very tight-fitting lid. Put the milk/cream mix inside the small can, and put the lid on it. You might want to use duct tape to make sure that the lid stays on. Then, put the small can inside the big can. Put the ice, salt and a little liquid water inside the big can, around the small can. Put the lid on the big can, and duct tape it shut. Then, play soccer with the can for about 15-20 minutes! Untape the cans, wipe off the little can, and enjoy the ice cream! Links to more information and activities: More versions of this activity:
The science of ice cream: More homemade ice cream recipes and techniques:
Turn this activity into a real experiment:
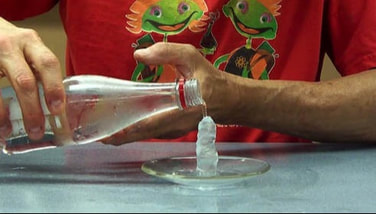 You may have seen videos of specially prepared super-cooled liquid water freezing instantly when shaken or tapped, just like ours below. But did you know that you can easily reproduce this demonstration at home? Many how-to articles on the internet tell you to simply put a bottle of water in your home freezer for some "to be determined" length of time, and while this can work, it's not very reliable. We'll show you a simple and almost fool-proof way to prepare super-cooled water and impress your friends, while also experimenting with another interesting property of water.
Experimental Procedure (note that the video above was only intended to show the basic setup and doesn't follow the experimental procedure outlined for this activity):
What's Happening: Most people believe water always freezes at exactly 32°F or 0°C. While it is true that pure water ice always begins to melt at 0°C, liquid water- even pure water- does not necessarily freeze at this temperature, and can remain a liquid at much colder temperatures (see the link below). This is called super-cooled water. The reason this can happen (not just for water, but for many substances that form crystals in their solid state) is that molecules of a liquid behave a little differently than those in either the solid state (where they are tightly locked into an orderly arrangement or crystal lattice) or gas state (where they are completely independent). All that is needed for a solid to melt is heat, which provides the energy for the crystal lattice to break apart and become liquid. On the other hand, simply cooling the molecules in a liquid does not make them form a solid. The molecules must begin to arrange themselves and form an orderly crystal lattice, and this takes a little more energy (this sort of "borrowed" energy is called the latent heat of fusion). Think of it this way: it's much easier to destroy a Lego house than it is to build one from scratch. It takes some thought and care to start building your house from the individual pieces. Forming a crystalline solid from individual liquid molecules is similar, the first few molecules must move into proper position and alignment to start building correct crystal lattice. Once this lattice begins to form, it becomes much easier for other liquid molecules to attach and continue growing the crystal lattice. The colder a liquid becomes, the more likely it is that some of the molecules will form that first crystal, but if they are not moving around much it may not happen. That's why we were very careful not to disturb the bottles until we wanted them to freeze. Tapping or shaking the bottle got the molecules moving around so that it became more likely that a few would move into the proper arrangement and form the first crystal (called a seed crystal or nucleation site), then the rest of the molecules quickly attached, and the entire bottle froze. The freezing or melting point of a substance is actually defined as the temperature at which the liquid and solid phases are in equilibrium. For pure water this means that ice is melting at exactly the same rate that liquid water is freezing so that the net amount of each stays about unchanged. That occurs at exactly 0°C (32°F) for pure water. This perfect equilibrium might seem very difficult to achieve, but actually as long as your bath contains plenty of both ice and water, and you are not adding or removing too much external heat (i.e. the cooler is well insulated), the phases will find their equilibrium and the temperature will stabilize at 0°C. That's why you should have measured 0°C (depending on the accuracy of your thermometer) in step 2. When the water in a bottle is super-cooled (below 0°C) it is not in equilibrium, since there is no ice. But once the first solid crystal forms, the amount of ice increases as more water freezes and the mixture quickly reaches equilibrium at 0°C- i.e. the temperature actually goes up as the water freezes, releasing the latent heat of fusion (see Additional Experiments below). That's why the ice that forms in the bottle is very soft and slushy, rather than frozen hard. To freeze the ice hard you must remove this extra heat somehow, perhaps by placing it back in the cooler. To super-cool a water bottle you lower it's temperature below the normal equilibrium freezing point by removing heat. Since heat only flows from hotter objects to colder ones, you need to place your bottle in contact with something colder, such as the cold air in a freezer. But most home freezers are typically set at about -10 to -15°C, so leaving the bottle in the freezer too long will lower the temperature so much that it is almost certain to form a seed crystal somewhere then freeze completely. Unless you can put a thermometer inside the bottle, you must check it often and remove it once it is supercooled but not frozen, which can be tricky. Another problem with this method is that most freezers use motors which cause vibrations, and just like when you tapped the bottle, this motion can form a seed crystal and freeze the water. You could use the ice water bath you prepared in Step 2 to cool the water, but this bath is in equilibrium at 0°C, so you can only cool your bottles to this temperature, which is not cold enough to super-cool the water. To super-cool your bottles you need an ice-water bath that is much colder than 0°C. Fortunately liquid water (or any solvent) has another very useful property- the freezing point of a solution (anything dissolved in a solvent) is always lower than the freezing point of the pure solvent. In our case this means that dissolving salt (the solute) in water (the solvent) lowers the freezing point of the salt-water solution, i.e. you must get it colder than pure water before it will freeze. This is why it is much more difficult to freeze sea water than fresh water. Note that this is not the same as super-cooled water; the salt-water is a solution, not pure water. This is also why you sprinkle salt on an icy road or sidewalk. The salt dissolves into the thin layer of liquid water that is usually present on the surface (unless the icy is very, very cold), lowering the temperature required for the ice to remain frozen. The more salt you dissolve, the lower the freezing point. It doesn't matter what kind of salt (or any other solute) you use, only how much you dissolve in the water. This is called a colligative property, meaning that it depends only on the number of particles, not their composition. Since solid ice is usually much colder than 0°C (you measured that in Step 1), adding ice to a salt water solution lowers the temperature of the solution. And since the freezing point of this salt-water-ice solution bath (the temperature where freezing and melting is in equilibrium) is lower that that of a pure water-ice bath, we can use this to super-cool our bottles of pure water. By adding enough salt it's relatively easy to prepare a bath that is -10°C or colder. Note that we used plastic water bottles in this experiment. Another interesting property of water is that it expands as it freezes, i.e. the solid phase takes up more volume than the same amount of molecules in the liquid phase. Put another way, the solid phase is less dense than the liquid phase, since density= mass/volume. That's why ice floats in liquid water (you may be surprised to learn that most substances do not exhibit this behavior!) If you were to use a glass bottle in this experiment, as the liquid water freezes there might not be enough space for the ice to expand, which would break the bottle. Variations and Related Activities: There are other interesting ways to instantly freeze super-cooled water. Very carefully unscrew the top from one of your bottles without freezing the water. Drop a small piece of ice into the water and watch as it instantly initiates freezing in the bottle. Since this piece is already solid, it serves as the seed crystal to which the liquid molecules can easily attach. You can also try slowly pouring liquid super-cooled water from the bottle onto a dish with a small piece of ice. The water will freeze as it hits the ice then continue freezing right up the pouring stream and into the bottle. For another experiment, carefully place a thermometer in the bottle of super-cooled liquid water. It should read a temperature well below 0°C. Now drop a small piece of ice into the bottle to initiate freezing and observe the temperature rise as the water freezes, until it finally reaches 0°C. As water freezes it releases heat (called the latent heat of fusion), and this heat has nowhere to go except into the rest of the water and ice in the bottle, which actually remelts some of the ice that has just frozen. This is why the bottle doesn't freeze into hard ice, but forms a very wet, slushy ice. Once the ice and water reaches equilibrium, its temperature must be at the freezing point, or 0°C.
Experiment with different types of water, which behave differently as they freeze. Some may freeze sooner (at higher temperatures), or faster, or form different shaped crystals. Note that most of these waters are actually not pure (only distilled or deionized water is pure) and contain various dissolved minerals, so their freezing point is slightly lower (just as with the salt-water bath you prepared). They are so dilute, however, that the effects of the solutes are generally negligible. Sparkling or carbonated waters are a noticeable exception. They contain dissolved carbon dioxide, so opening a bottle releases gas bubbles which may initiate freezing (they serve as nucleation sites for ice crystals to form), as well as lowering the concentration of the solute (carbon dioxide) and raising the freezing point. You can also experiment with different temperatures of super-cooled water. Generally speaking, the colder the water, the faster it will freeze once you start the process. In particular, warmer but still super-cooled water freezes slowly enough that you can easily watch individual crystals growing. Sometimes they form large snowflakes, making it appear to be snowing inside your bottle- but the snowflakes float up rather than fall down! Super-saturated (or super-cooled) sodium acetate solutions also crystalize and freeze instantly, releasing a tremendous amount of latent heat as they freeze, making them useful for "heat packs". Links to more information and activities: Freezing Point Depression: How does salt help melt ice: How cold can water be super-cooled before freezing?: Sodium acetate heat packs: More instant freezing of super-cooled water videos:
|

