|
What happens if you chew gum and chocolate at the same time? You'll find out in this sweet candy science experiment while learning an important concept in chemistry: solubility. Click and expand the tabs below to get started What you'll need
experimental procedure
what's happening
This is a chemistry experiment, even though you are doing it in your mouth! It illustrates a very important concept in chemistry called solubility, which is the ability of one substance to dissolve another substance. Chemists say that “like dissolves like” and this is an example of that. If your gum was candy coated, like a Chiclet or gum-ball, you should have noticed that the candy coating dissolved or disappeared as soon as you began chewing. This is because the candy coating was made of sugar, which easily dissolves in water (try adding a spoon full of table sugar to a glass of water and watch what happens), and the saliva in your mouth is mostly water. Chemists would say that sugar is soluble in water. Saliva and chewing are the first steps in digesting or breaking down your food into simpler components that your body can use for energy. Your saliva does not dissolve the gum, however, because most modern chewing gums are made of a synthetic rubber (i.e. man-made, not natural), which is a type of oil-based polymer, such as butadiene-styrene, vinyl acetate, or polyethylene (the same material in plastic grocery bags). You may have already learned that oil (as well as oil-based substances) and water don't mix- they are not alike. But chocolate does contain oil-based fatty substances, so the chocolate dissolves the gum. Like dissolves like. After adding the first piece of chocolate and chewing you should have noticed that the gum was much softer and stickier, and maybe much smaller than it was after you first chewed the gum alone. If you add enough chocolate to the gum in your mouth (you may need 3 or 4 pieces) and continue chewing you should be able to make the gum disappear completely! variations and related activities
If you're not allergic to peanuts, try chewing a spoon full of peanut butter with your gum instead of chocolate. Does the peanut butter also make the gum disappear? Why do you think that is? Instead of doing the entire experiment in your mouth, just chew the gum for a minute or two in your mouth, then put it in a cup or small bowl instead. Add a couple spoonfuls of vegetable oil to the cup and use a spoon to stir and grind the gum. Does it dissolve? If not, add a little more vegetable oil. Try repeating ths experiment with some other liquids. Is gum more or less soluble in other liquids? Solubility has it's limits, however, and you can easily test this. Add one or two spoonfuls of sugar to a glass of water and observe what happens. Does all of the sugar dissolve immediately? Observe for a minute or two, has more dissolved? Use a spoon tp stir the water and sugar. Does it dissolve more easily? Try adding more spoonfuls of sugar and stirring. Does the sugar continue to dissolve? Keep adding sugar until it will no longer dissolve in the water. Now you have reached the solubility limit- the water simply can't hold any more sugar and we say it is saturated. What would happen if you added more water to the glass? Solubility also depends temperature. With the help of an adult try repeating this experiment with warm or hot water. Is sugar more soluble in hot water, i.e. can you make more spoonfuls of sugar dissolve? Coming soon: make rock candy float letters off M&M's pop rocks dancing raisins carbonated soft drinks Lava Lamps Dissolve egg shell in vinegar Underwater fireworks (food coloring dissolves in water but not oil) Oil-based and water-based paints references and links to more information
Journal of Chemistry Education Classroom Activity #105. A Sticky Situation: Chewing Gum and Solubility Learn more about solubility: Coming soon: Saliva Digestion Solubility experiments
Return to Try Science at Home
1 Comment
Click and expand the tabs below to get started.
What you'll need
experimental procedure
what's happening
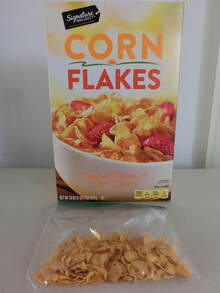
Iron is a crucial component of a balanced diet (there should actually be enough iron in your body to make one or two small nails), but some people might not consume enough iron naturally to sustain themselves. Because of this, many food manufacturers add iron to some foods to boost the average daily intake of this important mineral. Some foods may use a chemical form like ferric orthophosphate (FePO4) or ferrous sulfate (FeSO4), but most cereals simply use elemental (i.e. the pure atom) iron (Fe), also called "Reduced Iron".
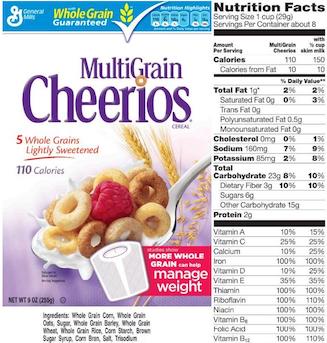
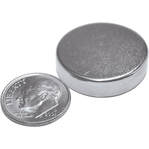
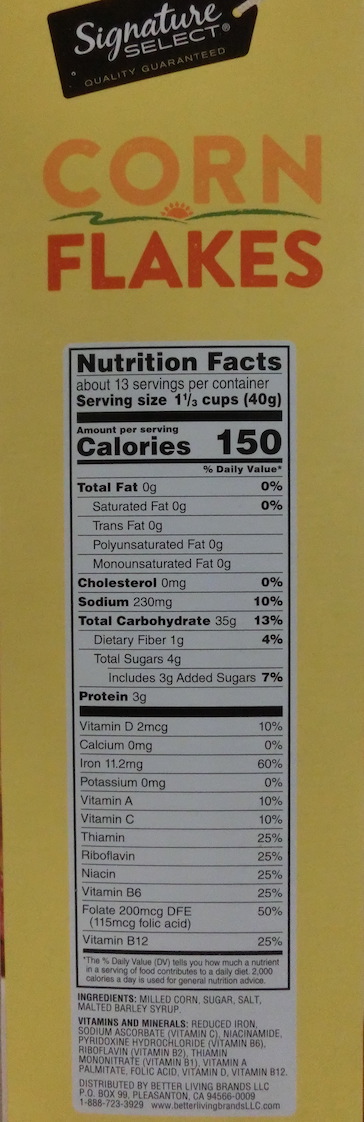
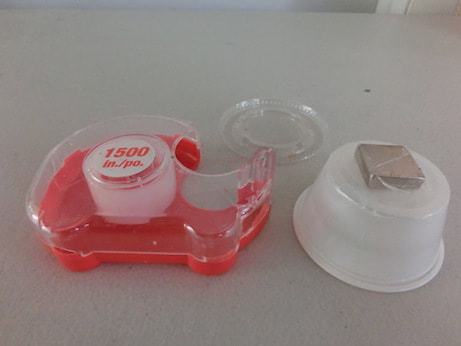
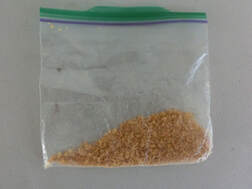
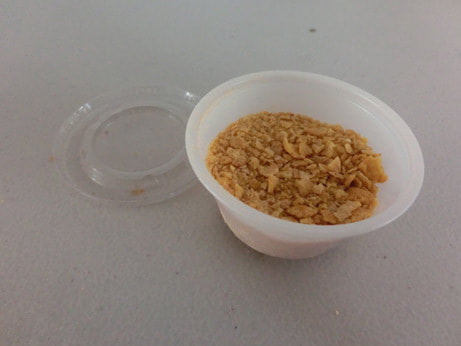
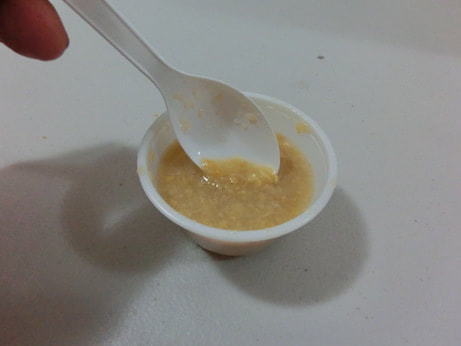
The iron you see in your cereal is elemental iron- actual metallic iron filings or shavings similar to the little flakes you might see come off of a steel wool pad when you squeeze or rub it, just much smaller. That's right, you're eating metal in the morning! But not to worry, acids in your digestive tract can change this metallic iron into a form that is easily absorbed and used by your body. [Note: if you don't see any iron particles in this experiment you probably have a cereal that add one of the chemical forms listed above, so try a different cereal instead.] These very tiny metal particles are mixed into the rest of the cereal ingredients, which is why you don't normally see them, but a magnet will attract these small iron filings that are present in the cereal, separating them from the other cereal components which are not attracted to the magnet (there's more information about magnetism in the reference links below). Crushing the cereal and mixing it with water makes it much easier to separate the iron. By the way, this is also why you need to use a wooden popsicle stick or plastic spoon to stir in Step 8 of the procedure above (if your cup doesn't have a lid). Most metal spoons are made of steel, which contains a lot of iron and therefore will also be attracted to your magnet (although some types of steel are actually not very magnetic at all). Separating iron from cereal requires a powerful magnetic field, which is why we need to use a strong neodymium magnet, which is actually made from the elements neodymium, iron and boron (Nd2Fe14B). Neodymium is rarely found in nature, so these magnets are sometimes called Rare Earth magnets. Neodymium magnets are usually plated with a thin layer of another metal like nickel so they look like they're metal, but they are actually a type of ceramic. Ceramic materials are similar to glass, so these magnets are fragile and can shatter or break quite easily, often producing sharp edges, if you allow them to slam together. Because of this as well as their strength they must be handled very carefully. Some breakfast cereals contain much more iron that other cereals. You can find out how much iron any cereal contains by reading the "Nutrition Facts" labels on the side of the box (like the photo above). For example, "Total" cereal contains 100% of the recommended daily iron allowance, while "Shredded Wheat" contains only 8% - this is why you should see more iron filings from the Total cereal. Test several different cereals, does the amount of iron you see agree with the information on the labels? Is it important that you use the same amount of each cereal and shake it for the same length of time? Is it important to use the same amount of water? Why or why not?
variations and related activities
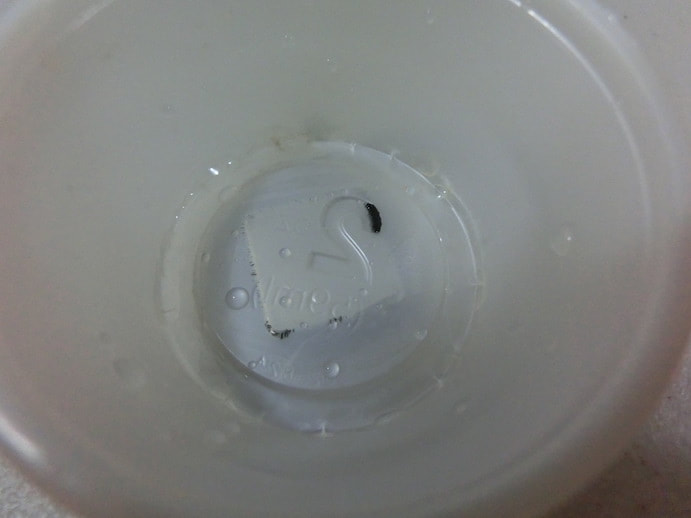
After you have separated the iron from the cereal and water mix and rinsed the cup with water, carefully remove the magnet from the bottom of the cup. Be sure not to tip the cup as once the magnet is removed the iron particles will be free to move. Add a little bit of water to the cup and gently stir or swirl the cup to mix the iron particles. Now hold the magnet near the sides or bottom of the cup and observe how the tiny iron particles move. Try holding the magnet in different positions. How does this affect the movement and orientation of the iron particles? If you're careful you may be able to observe the shape of the magnetic field lines that surround the magnet. You can also try this with a little bit of vegetable or baby oil instead of water in the cup [first tape the magnet to the bottom of the cup again to attract and pin all the iron, then carefully dump out the water and gently dry the cup without disturbing the iron particles, then add the oil]. How does the oil affect the motion of the iron particles?
If you hold your magnet near a flake of piece of the cereal, does it move? What if you crush the cereal into smaller pieces? Try floating a piece of cereal in a bowl of water, then holding the magnet very close. Does it move now? Another way to do this experiment is to place your magnet inside a small balloon, squeeze out any air inside, then tie it. Now simply drop the balloon into your bowl of mashed cereal and water mixture, attach the lid and shake several minutes as before. Open the lid, remove the balloon and rinse it with water to see the iron filings stuck to the balloon. If you want to try another cool science experiment with your left over cereal (although it has nothing to do with iron or metal), check out the "Cheerios Effect" (see reference link below). As the name suggests, it works best with Cheerios, but try it with other cereals too.
References and links to more information
Other variations of this experiment:
Why iron is so important for your body:
Which breakfast cereals have the most iron:
Iron and magnetism (ferromagnetism):
Magnetic field lines: The Cheerios Effect (and how it affects bugs that walk on water):
¡Hay metal en mi cereal! (en español)
Los metales como el hierro y el acero se utilizan para fabricar automóviles, barcos y clavos. Es posible que también haya escuchado que necesita alimentos ricos en hierro en su dieta para una buena salud; la deficiencia de hierro puede provocar enfermedades como la anemia. Pero tal vez nunca se dio cuenta de que en realidad es el mismo hierro en cada caso. Así es, estás comiendo exactamente lo mismo que se encuentra en las uñas todos los días, ¡y en este experimento lo verás por ti mismo!
Lo que necesitarás
Procedimiento experimental
QUÉ ESTA PASANDO
El hierro es un componente crucial de una dieta equilibrada (en realidad, debería haber suficiente hierro en su cuerpo para hacer una o dos uñas pequeñas), pero es posible que algunas personas no consuman suficiente hierro de forma natural para mantenerse. Debido a esto, muchos fabricantes de alimentos agregan hierro a algunos alimentos para aumentar la ingesta diaria promedio de este importante mineral. Algunos alimentos pueden usar una forma química como el ortofosfato férrico (FePO4) o el sulfato ferroso (FeSO4), pero la mayoría de los cereales simplemente usan hierro (Fe) elemental (es decir, el átomo puro), también llamado "Hierro reducido".
El hierro que ve en su cereal es hierro elemental, limaduras o virutas de hierro metálico reales similares a las pequeñas escamas que puede ver salir de una almohadilla de lana de acero cuando la aprieta o frota, pero mucho más pequeñas. Así es, ¡estás comiendo metal por la mañana! Pero no se preocupe, los ácidos en su tracto digestivo pueden cambiar este hierro metálico a una forma que su cuerpo absorbe y utiliza fácilmente. [Nota: si no ve ninguna partícula de hierro en este experimento, probablemente tenga un cereal que agregue una de las formas químicas mencionadas anteriormente, así que pruebe con un cereal diferente en su lugar.] Estas diminutas partículas de metal se mezclan con el resto del ingredientes de los cereales, por lo que normalmente no los ve, pero un imán atraerá estas pequeñas limaduras de hierro que están presentes en el cereal, separándolos de los otros componentes del cereal que no son atraídos por el imán (hay más información sobre el magnetismo en los enlaces de referencia a continuación). Triturar el cereal y mezclarlo con agua hace que sea mucho más fácil separar el hierro. Por cierto, esta es también la razón por la que debe usar un palito de paleta de madera o una cuchara de plástico para revolver en el Paso 8 del procedimiento anterior (si su taza no tiene tapa). La mayoría de las cucharas de metal están hechas de acero, que contiene mucho hierro y, por lo tanto, también se sentirán atraídas por su imán (aunque algunos tipos de acero en realidad no son muy magnéticos). La separación del hierro del cereal requiere un campo magnético potente, por lo que necesitamos utilizar un imán de neodimio potente, que en realidad está hecho de los elementos neodimio, hierro y boro (Nd2Fe14B). El neodimio rara vez se encuentra en la naturaleza, por lo que estos imanes a veces se denominan imanes de tierras raras. Los imanes de neodimio generalmente se recubren con una capa delgada de otro metal como el níquel para que parezcan de metal, pero en realidad son un tipo de cerámica. Los materiales cerámicos son similares al vidrio, por lo que estos imanes son frágiles y pueden romperse o romperse con bastante facilidad, a menudo produciendo bordes afilados, si permite que se golpeen entre sí. Debido a esto, así como a su fuerza, deben manejarse con mucho cuidado. Algunos cereales para el desayuno contienen mucho más hierro que otros cereales. Puede averiguar cuánto hierro contiene cualquier cereal leyendo las etiquetas de "Información nutricional" al costado de la caja (como la foto de arriba). Por ejemplo, el cereal "Total" contiene el 100% de la cantidad diaria recomendada de hierro, mientras que el "Trigo desmenuzado" contiene solo el 8%; es por eso que debería ver más limaduras de hierro del cereal Total. Pruebe varios cereales diferentes, ¿la cantidad de hierro que ve coincide con la información de las etiquetas? ¿Es importante que use la misma cantidad de cada cereal y lo agite durante el mismo tiempo? ¿Es importante utilizar la misma cantidad de agua? ¿Por qué o por qué no?
variaciones y actividades relacionada
Próximamente
REFERENCIAS Y ENLACES A MÁS INFORMACIÓN
Otras variaciones de este experimento:
Por qué el hierro es tan importante para tu cuerpo:
Qué cereales para el desayuno tienen más hierro:
Hierro y magnetismo (ferromagnetismo):
Líneas de campo magnético: El efecto Cheerios (y cómo afecta a los insectos que caminan sobre el agua):
Return to Main Menu
Have you ever wondered what makes a flour dough rise, or why there are lots of little holes inside your bread or pancakes? And what is the difference between baking soda and baking powder? Well, you're in luck because that's what this experiment is all about.
Este experimento está disponible en español Click and expand the tabs below to get started.
what you'll need
experimental procedure
what's happening
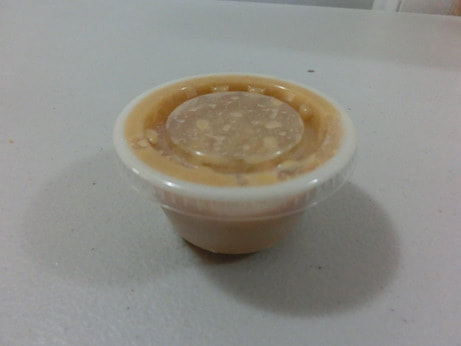
Baking soda is the common name for sodium bicarbonate, a type of substance or chemical called a base. When it is mixed with water is simply dissolves with no reaction. Baking powder, however, contains not only sodium bicarbonate but also another type of chemical called an acid (or sometimes two different acids). When these chemicals dissolve in water the base sodium bicarbonate reacts with the acid. This is called a chemical reaction because it results in the creation of one of more new and completely different substances. Acids and bases often react with each other. In this reaction the new substance is a gas called carbon dioxide, which is the tiny bubbles that you observe. You can also hear them popping as the gas escapes.
The baking soda did not react because there was no acid present, but if you add a little acid like vinegar or lemon juice then you will get a reaction that also produces carbon dioxide gas- in fact, lots of gas bubbles and foam! You may have done this reaction before to make the famous vinegar and baking soda volcano! Chemical reactions like this are used in baking breads, pancakes, cookies and other foods. When mixed with flour and water to make a dough the gas bubbles are trapped inside and cause the dough to inflate like a balloon or rise. That's what happened in the third cup when you added flour. This is called leavening, and ingredients like baking powder or baking soda are call leavening agents. Baking this dough at high temperature in an oven causes the flour molecules to lock together into a firm solid structure giving us something good to eat! Meanwhile the carbon dioxide bubbles eventually pop and the gas escapes, leaving behind the tiny little holes we see in baked goods.
variations and related activities
Some recipes use baking soda instead of baking powder because there is some other ingredient already present that provides the acid needed to produce the gas. Some recipes even use both baking soda and baking powder to produce carbon dioxide at different times during the baking.
Most baking powder used today is "Double Acting Baking Powder". It contains two different acids, one which reacts as soon as the water is added and a second acid that doesn't react until it reaches a certain high temperature. This causes the dough to rise twice- once when it is first mixed then again during baking in the oven. You can continue this activity in a tasty way with a simple homemade pancake recipe (see link below), and make it into a real experiment by making some pancakes without the baking powder and baking soda. How do these pancakes compare to the normal ones? What if you leave out one of the other ingredients? Pizza dough and some other baked goods use a very different ingredient- yeast- to make the dough rise. Yeasts are actually tiny living organisms called fungi that "eat" sugars and "burp" carbon dioxide gas. Check out the references below if you would like to experiment with yeast.
references and links to more information
What purpose do the various ingredients serve in baking?:
Try a pancake science recipe and experiment: Other baking science experiments: More baking Soda experiments:
Yeast science and baking experiments:
Hornear con gas (en español)
¿Alguna vez te has preguntado qué hace que la masa de harina se eleve o por qué hay muchos pequeños agujeros dentro de tu pan o panqueques? ¿Y cuál es la diferencia entre bicarbonato de sodio y levadura en polvo? Bueno, estás de suerte porque de eso se trata este experimento.
Lo que necesitarás
Procedimiento experimental
Qué esta pasando
Bicarbonato de sodio es el nombre común del bicarbonato de sodio, un tipo de sustancia o químico llamado base. Cuando se mezcla con agua, simplemente se disuelve sin reacción. Sin embargo, el polvo de hornear contiene no solo bicarbonato de sodio, sino también otro tipo de químico llamado ácido (oa veces dos ácidos diferentes). Cuando estos productos químicos se disuelven en agua, el bicarbonato de sodio básico reacciona con el ácido. Esto se llama reacción química porque da como resultado la creación de una o más sustancias nuevas y completamente diferentes. Los ácidos y las bases a menudo reaccionan entre sí. En esta reacción, la nueva sustancia es un gas llamado dióxido de carbono, que son las diminutas burbujas que observas. También puede escucharlos estallar cuando el gas se escapa.
El bicarbonato de sodio no reaccionó porque no había ácido presente, pero si agrega un poco de ácido como vinagre o jugo de limón, obtendrá una reacción que también produce dióxido de carbono, de hecho, ¡muchas burbujas de gas y espuma! ¡Es posible que hayas hecho esta reacción antes para hacer el famoso volcán de vinagre y bicarbonato de sodio! Las reacciones químicas como esta se utilizan para hornear panes, panqueques, galletas y otros alimentos. Cuando se mezcla con harina y agua para hacer una masa, las burbujas de gas quedan atrapadas en el interior y hacen que la masa se infle como un globo o se eleve. Eso es lo que sucedió en la tercera taza cuando agregaste harina. ¡Hornear esta masa a alta temperatura en un horno hace que las moléculas de harina se bloqueen en una estructura sólida y firme que nos da algo bueno para comer! Mientras tanto, las burbujas de dióxido de carbono eventualmente explotan y el gas escapa, dejando atrás los pequeños agujeros que vemos en los productos horneados.
Variaciones y actividades relacionadas
Algunas recetas usan bicarbonato de sodio en lugar de polvo de hornear porque ya hay algún otro ingrediente presente que proporciona el ácido necesario para producir el gas. Algunas recetas incluso usan bicarbonato de sodio y polvo de hornear para producir dióxido de carbono en diferentes momentos durante la cocción.
La mayor parte del polvo de hornear que se usa hoy en día es el "polvo de hornear de doble acción". Contiene dos ácidos diferentes, uno que reacciona tan pronto como se agrega el agua y un segundo ácido que no reacciona hasta que alcanza una cierta temperatura alta. Esto hace que la masa suba dos veces, una cuando se mezcla por primera vez y luego nuevamente durante la cocción en el horno. Puede continuar este experimento de una manera sabrosa con una receta de panqueques casera simple (link abajo). La masa de pizza y algunos otros productos horneados utilizan un ingrediente muy diferente, la levadura, para hacer que la masa suba. Las levaduras son en realidad pequeños organismos vivos llamados hongos que "comen" azúcares y "eructan" gas de dióxido de carbono. Consulte las referencias a continuación si desea experimentar con levadura
what you'll need
experimental procedure
what's happening
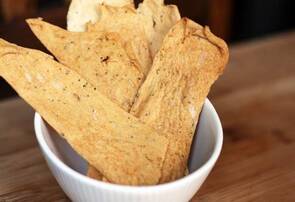
Let’s take a closer look at our crackers. Do they look poofy at all to you? Or are they pretty flat? They should be flat, because we didn’t add any leavening to them. Leavening is the cooking term for any ingredient that will make things that you bake poofy. Things like baking powder and baking soda make bread and cakes rise because they react with other ingredients in the dough to make carbon dioxide bubbles. The holes that we see when we look at a piece of bread are the outsides of those carbon dioxide bubbles. The carbon dioxide escapes into the air, and we have a delicious piece of bread. However, in this case, we didn’t want the crackers to be poofy, so we didn’t put anything in that would make the bubbles. So, our crackers should be flat and delicious! variations and related activities
Coming soon. references and links to more information
Coming soon.
Return to Main Menu
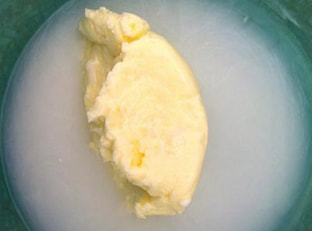 You won't believe how easy it is to make your own butter simply by shaking a cup of heavy whipping cream, which comes from milk. Give it a try- and you even get to eat this experiment when you're done! Click tabs below to get started what you'll need
For whipped cream (optional):
Be sure to ask your mom, dad or another adult to help-you can share your butter with them. experimental procedure
Once you finish rinsing your butter, remove all the water and taste it on some bread or a cracker. Most butter you find in the grocery store has salt added, but your butter is unsalted (sometimes called sweet butter). If you don't like the taste, add a pinch of salt. Additional Optional Experimental Procedure: You can also make your own real whipped cream.
what's happening
Butter is very interesting scientifically. We used cream to make butter, but where does cream come from? Cream comes from cows. It is part of the milk that a cow gives. It has a lot of fat in it. Fat occurs in pieces called molecules. These molecules like to stick together in big clumps, but at the dairy they homogenized the milk to keep the fat and everything else all mixed up well. When you shake the cream, however, the molecules which were floating around start sticking to each other. When enough of them stick together they won't float or stay mixed up any more and you have butter!
more detailed explanation
You've probably heard that oil and water don't mix, but milk is in fact a mixture of many different components, including sugars, proteins, fats and yes, water. [Fats and oils are basically similar molecules, also often called lipids, and made of smaller building blocks called fatty acids. Although fat, oil and lipid are often used to refer to fats, "oil" generally refers to a fat that is liquid at normal room temperature and "fat" is solid at room temperature.] The oil or fat in milk can mix with water without separating because they form into little globules sort of like water balloons. The fat is inside a thin skin or membrane which helps attract water somewhat, and because fat is less dense than water, the globules float and form what's called a colloidal suspension or emulsion. The smaller the globules, the easier it is for them to remain emulsified, but if they are too large they will separate and float to the surface. Years ago before milk was homogenized, the fat globules would float to the top and form a layer called the cream, which contained most of the milk's fat. Homogenization breaks up the larger globules into smaller ones, which, along with the milk proteins that then help form a stronger globule membrane, prevent this separation. The cream you buy at the grocery store is separated at the dairy and then homogenized to keep the fat suspended in the liquid. Heavy whipping cream means that it has a very high fat content, 36-40% (normal cream is about 30% fat, while Half & Half is 12% and whole milk 3.5% fat). Butter is essentially pure milk fat.
In our heavy cream, the fat globules are still emulsified, or suspended in the water along with some protein and sugar. If we shake the cream though, the globules will begin to crash into one another and pop or burst their membranes. When this happens the fat molecules spill out and clump together with other fat molecules. At first as this happens the fat traps a lot of air and forms bubbles or foam, which is the whipped cream. The more you shake it, however, the more bubbles pop and the more densely the fat clumps become until they can no longer remain suspended in the water, and they separate completely. This is the butter, and the remaining liquid, mostly water and proteins, is called buttermilk. The butter you make is not only good to eat, but will stay fresh for a long time, especially if it is thoroughly rinsed of all the milk liquid, since the milk can spoil. Adding sugar to the whipped cream not only sweetens and thickens it, but helps prevent the fat bubbles from popping so that it will stay a light fluffy foam much longer. variations and related activities
Try using cold heavy whipping cream to make butter. Try warm cream. Does it take more or less shaking to get to butter? How do you think temperature affects this process? If you like these milk science activities, you can also try our Milk Fireworks experiment, as well as making cottage cheese and glue (see link below) from milk. references and links to more information
Others versions of this activity:
Experiment with the temperature of the cream: Learn more about milk chemistry: What is homogenized milk?: Whipped cream as a science fair project:
What happens when whipped cream comes out of a can?: You can also make glue from milk:
Return to Main Menu
experimental procedure version 1
There are two versions of this experiment - Mentos and Diet Coke vs. Mentos and other diet sodas and Mentos and Diet Coke vs. other candies and Diet Coke. The reason that there are two versions of this experiment is that scientists usually only change one thing (called a variable) at a time. So, one version changes the soda that is used, and the other version changes the candy that is used. Version 1 - Mentos and Diet Coke vs. Mentos and other diet sodas
experimental procedure version 2
What's happening
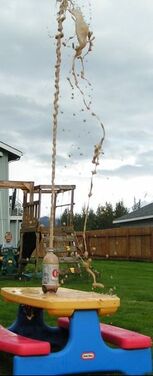
It's all about the bubbles. Have you ever been pranked by someone who secretly shook a can of soda pop before giving it to you to open? Why does the can explode in a fountain of sticky foam? The foam is the liquid from your drink plus lots of bubbles containing carbon dioxide gas added when the soda pop was made, and is what make carbonated drinks so fizzy. This carbon dioxide gas actually dissolves into the liquid soda pop (just like when you stir sugar or salt into water), and manufacturers are able to dissolve much more carbon dioxide- making it even fizzier- by pushing gas into the can or bottle under very high pressure before sealing it. This establishes an equilibrium, with the ratio of the number of carbon dioxide gas molecules at the top of the can to the number of molecules dissolved into the flavored water below remaining constant. When you open your drink, however (without shaking it first), the gas at the top quickly escapes (that's the "pssst" sound you hear) but this also disturbs the equilibrium. This sudden drop in pressure forces a lot of the dissolved carbon dioxide to come out of solution and form gas bubbles in the liquid which quickly float to the surface, pushing some liquid with them and forming a layer of foam. But it takes a lot of energy to initially create a gas bubble inside the liquid, as carbon dioxide molecules must push water molecules- which are strongly attracted to each other- out of the way, so most of the energy available is quickly used up. This means that the bubbles remain fairly small, there isn't much foam, and you don't make a mess. You can't (usually) see what's happening inside a sealed aluminum can, but when you shake it the energy you add creates lots and lots of tiny bubbles (see the related activity below). Now when you open the can the gas at the top quickly escapes, and just as before, much of the dissolved carbon dioxide comes out of solution as gas molecules. But this time they don't need to waste their limited energy forming the bubbles, as your shaking has already created lots of tiny "starter" bubbles in the liquid, so all this extra carbon dioxide gas easily moves into these little bubbles, making them grow much bigger, much faster. Bigger bubbles float to the surface faster, pushing a lot more liquid with them, and you get a foamy explosion! BTW- if your can of soda is very warm you may not need to shake it to make a mess. Can you guess why? Shaking the can or bottle is one way to create a bubbly mess, but there are other ways, and some work MUCH better, as you saw in this experiment! There are actually several different reactions happening at the same time to create bubbles when you mix Mentos with Diet Coke, and not all scientists agree about all of them, but here are the basic ideas.
All of these things together combine to produce the reaction that we know and love when we put Mentos and Diet Coke together. However, does that mean that the reaction between Mentos and Diet Coke is the best that it can possibly be? Not necessarily! What if you find a soda that has more of one of these reactants (like caffeine)? Experiment with these variables, and see what you can find out! variations and related activities
Rock salt (like you put on the sidewalk to melt ice) also reacts well with Diet Coke. Try it. You may also want to try granular salt (i.e. what's in your kitchen salt shaker). Does it work as well (it's exactly the same chemically)? Hint- think about the nucleation sites. What if the hole that the carbon dioxide and soda came through was smaller? What would happen to the height of the bubbles? Remember, however, that pressure is building up in the bottle, and that it has to get out somewhere. You can't see what happens inside an aluminum can of soda pop when shaken, but you can see through most plastic bottles. Try shaking a bottle of clear soda pop (like 7-Up, Sprite or Ginger Ale) to see all the tiny bubbles created. Unscrew the cap quickly and you will get a foamy mess. What happens if you wait until all of the bubbles float to the surface and pop before opening the bottle? The wrinkles in raisins are also very good nucleation sites for carbon dioxide bubbles to form in soda pop. Try adding 5 or 6 raisins (fresh ones work best) to a bottle or tall glass of a clear soda pop like 7-Up, Sprite or Ginger Ale. You probably won't get an explosion, but there will be bubbles and you may be surprised what they do to the raisins! Look for a new experiment page soon that will explain what's happening (or see the links below), but we think you can figure it out if you observe carefully. References and links to more information
https://www.youtube.com/watch?v=zGMxEr2AxHM This is the Mythbusters episode that deconstructs what happens when you put Mentos in soda. Parent note: There are a few shots of Kari Byron wearing a swimsuit that are a bit revealing, but other than that, the science explored here is well done and well tested. https://www.youtube.com/watch?v=fBkbWKFv2pE The original Eepybird video using Diet Coke and Mentos, which some people say started the craze. https://www.eepybird.com/featured-video/coke-and-mentos-featured-video/science-of-coke-mentos More explanation from Eepybird. https://www.acs.org/content/acs/en/education/whatischemistry/adventures-in-chemistry/experiments/mentos-diet-coke.html Explanation from the American Chemical Society. https://www.stevespanglerscience.com/lab/experiments/original-mentos-diet-coke-geyser/ Steve Spangler has some ideas about how to take this further, as well. http://www.appstate.edu/~coffeyts/DietCokeandMentos.pdf A bona fide scientific study of what is happening and why. https://www.scientificamerican.com/article/why-does-a-shaken-soda-fi/ https://www.scienceabc.com/pure-sciences/why-a-soft-drink-bottle-fizzes-when-opened.html https://chemistry.stackexchange.com/questions/40502/why-does-soda-pop-after-shaking https://www.stevespanglerscience.com/lab/experiments/soda-can-shake-up-experiment/ https://www.livescience.com/34159-tap-soda-can-carbonation.html https://www.snopes.com/fact-check/on-tap/ More explanations of what happens when you shake a can of soda. Some people think there is a trick to keep a shaken can from exploding, but others think it's a myth. Maybe you should try to confirm or bust the myth! Does this apply to plastic bottles too? https://funlearningforkids.com/dancing-raisins-science-experiment-kids/ https://www.thoughtco.com/the-dancing-raisin-science-experiment-2086765 https://www.stevespanglerscience.com/lab/experiments/dancing-raisins-the-bubble-lifter/ Adding a few raisins to a glass of soda pop is a lot more fun than you may think!
Basic Procedure:
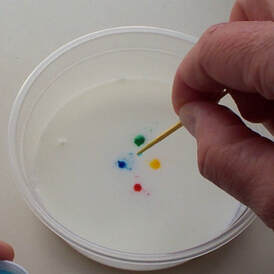
If everything works, you should see the food coloring begin moving around, leaving colored streaks and swirls on the milk surface. You may also see bursts of color suddenly appear from an otherwise plain white surface, just like colorful volcanoes or fireworks erupting. If nothing happens after several seconds, try touching another drop of soap to the milk surface, perhaps in a different spot. You can also try gently rubbing a little soap on the bottom of the bowl, or even carefully adding a drop of soap directly to the surface, but don't add too much soap. A drop or two is all you should need. Be patient- sometimes nothing may seem to be happening for a minute or more, but colors are moving around below the surface and will suddenly burst into view. Remember not to stir the milk or shake the bowl- we want the colors to move on their own, not because you move them! Additional Experiments:
What's Happening: Mother's milk is an amazing substance, which really isn't surprising considering that it contains all of the nutrients a baby needs to survive and grow. The plain white liquid you see is actually a uniform (homogenous) mixture consisting of fats or oils (composed of molecules called fatty acids), sugars, proteins, vitamins and some other chemicals, but mostly water molecules. This is called an emulsion or suspension- a mixture of liquids and solids, most of which are not truly dissolved. Normally these various components would separate (and in raw or non-homogenized milk some, notably the fats, still do), but the fatty acid and protein molecules have both hydrophilic (water-loving) and hydrophobic (water-hating) regions, which causes these long molecules to twist around and group together into more stable arrangements, making it possible for them to stay suspended in the water. The fatty acids form globules, sort of like little water balloons (or in this case, fat balloons), with their hydrophobic ends on the inside and their hydrophilic ends on the outside facing the water molecules. The proteins form similar balloon-like structures called micelles. Thus, the milk is in a complex state of equilibrium (i.e. not changing), with all the molecules not exactly "happy" to be where they are, but at least willing to stay put as long as they aren't "upset" too much. When you gently add the food color (which are dissolved in water) they are also happy to stay put in their own tiny puddles. Molecules of dish detergent, like fats and protein, also have both hydrophilic and hydrophobic regions, so adding them to the surface of the milk completely disrupts the existing state of equilibrium as the soap molecules grab and pull on the fat globules and protein micelles. Scientists say that on a molecular level, this soapy region of the milk is in a state of chaotic disarray and all of the various molecules begin to move about, dragging the food colors with them as they try to return to some equilibrium. In other words, before the soap was added the molecules in the milk were at least where they liked to be and didn't want to be disturbed. Then come along these annoying soap molecules like bullies that want to disturb everything (on a molecular level, of course). Because milk is all white, we wouldn’t normally be able to see what's happening, but as the food coloring is sort of caught in the middle we can observe all the action taking place. The fats in milk are largely responsible for the action in this experiment, so milks with more or less fat may behave differently, including milks from other mammals (see the link below). Temperature also affects many physical and chemical reactions because more energy is available at higher temperature. References and links to more information: Others versions of this activity:
Milk from other mammals: What is homogenized milk?: Learn (LOTS) more about milk chemistry:
Experimental Procedure:
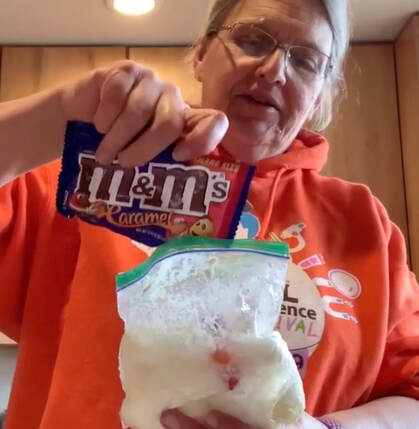
What’s Happening: The science behind this is actually rather complex, and is explained in much greater detail in our Instant Freeze Super-Cooled Water lab. Basically, when salt (or anything else) is dissolved in water it lowers the freezing point of the salt-water solution below that of pure water alone. In other words, when you put the salt and the ice together, you are making a solution that can get much colder than 32 degrees Fahrenheit (the normal freezing or melting temperature of pure water) and still remain liquid. This is called freezing point depression, and it can be very useful when you are trying to get something else really cold (in this case, the ice cream). Freezing point depression is also why the milk or cream needs to be much colder than 32°F before it will freeze; milk is mostly made of water, but with a lot of other stuff dissolved in it, and that lowers its freezing point too. As you shake the big bag, sloshing around the smaller bag inside, the super cold salt-ice-water solution in the big bag takes heat away from the cream/milk inside the smaller bag, lowering the temperature enough for it to freeze. You should also notice that this heat flowing out of the small bag melts even more of the ice in the big bag- it gets sloshier as you shake it. Of course heat from your hands does the same thing (and you might want to wear gloves as you shake the bags). It's very important that you shake the bags vigorously while the milk/cream is freezing. This breaks up the ice crystals that are forming inside the smaller bag and keeps your final ice cream smooth and creamy- just the way you probably like it. If you don't shake the bags, as these ice crystals form they will stick to each other and you'll end up with a hard frozen block of milk instead- a milk-sicle! Try it by placing another Zip-Lock bag or cup of milk in your freezer to see what happens. Variations and Related Activities: Here's another way to make ice cream, which uses the same ideas, but slightly different materials:
You can play around with many different ways to make ice cream. What if you used skim milk? 2% milk? A combination of the two? Does it take longer for them to freeze? What if you used chocolate milk? Do you prefer richer ice cream (made with pure cream), or not-so-rich ice cream (made with Half and Half)? What about ice milk (which is ice cream made with milk and no cream at all)? Which tastes the best? Another way to do this is to get two metal cans (coffee cans work well). One should be able to fit inside the other, with room for the ice and salt. It should also have a very tight-fitting lid. Put the milk/cream mix inside the small can, and put the lid on it. You might want to use duct tape to make sure that the lid stays on. Then, put the small can inside the big can. Put the ice, salt and a little liquid water inside the big can, around the small can. Put the lid on the big can, and duct tape it shut. Then, play soccer with the can for about 15-20 minutes! Untape the cans, wipe off the little can, and enjoy the ice cream! Links to more information and activities: More versions of this activity:
The science of ice cream: More homemade ice cream recipes and techniques:
Turn this activity into a real experiment:
What you'll need:
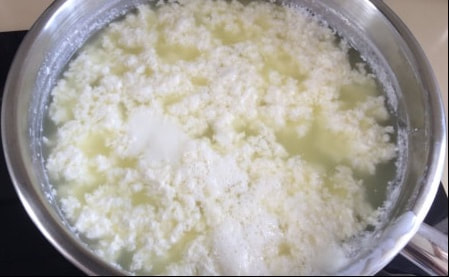
As always, be sure to ask your mom, dad or another adult to help- they'll want to taste your result. All utensils and ingredients should be clean and food-safe if you want to taste your results. Experimental Procedure:
What's Happening: Mother's milk is an amazing substance, which really isn't surprising considering that it contains all of the nutrients a baby needs to survive and grow. The plain white liquid you see is actually a uniform (homogenous) mixture consisting of fats or oils (composed of molecules called fatty acids), sugars, proteins, vitamins and some other chemicals, but mostly water molecules. This is called an emulsion or suspension- a mixture of liquids and solids, most of which are not truly dissolved. Normally these various components would separate (and in raw or non-homogenized milk some, notably the fats, still do), but the protein and fat molecules have both hydrophilic (water-loving) and hydrophobic (water-hating) regions, which causes these long molecules to twist around and group together into more stable arrangements, making it possible for them to stay suspended in the water that makes up most of milk by volume. The proteins form micelles, sort of like little water balloons (or in this case, protein balloons), with their hydrophobic ends on the inside and their hydrophilic ends on the outside facing the water molecules. The fat molecules form similar but much larger balloon-like structures called globules. Our "I can't believe It IS Butter!" experiment dealt with the fat globules in milk, while in this experiment we focus instead on the protein micelles. There are dozens of different proteins in milk, but they can be grouped into two main categories: the so-called curds and whey proteins from the "Little Miss Muffet" nursery rhyme. In cow's milk the curd proteins, called caseins, outnumber whey proteins about 4 to 1 by weight. One important difference is that caseins will coagulate or form solid clumps under acidic conditions while the whey proteins will remain suspended in the liquid, and that is what is happening in this experiment. Milk solid curds are used to make cheeses, or in our case cottage cheese. Most cottage cheese you buy in the grocery store is salted, which is why the cottage cheese curds you made may have tasted a little different (you may have also tasted the lemon or lime if you didn't rinse them well). Lemons and limes have an acid called citric acid in their juice, as do other citrus fruits like oranges and grapefruit. Normally the casein micelles have negative electric charge on their outer surfaces so that they all repel each other and remain suspended in milk. When you added lemon or lime juice to your milk the citric acid neutralized these negative charges and allowed micelles to begin sticking together in larger and larger clumps, which also trap much of the fat in the milk as they form. We can also say that the milk has curdled. It was these casein curds that you caught in your strainer, while the liquid that passed through contained the remaining whey proteins. Heating the milk also strongly enhances this coagulation process. Special chemicals called enzymes can also be used to produce milk curds (described in some of the links below). In this experiment you produced a simple cottage cheese, which is essentially the first step in making any kind of cheese, though most types require many more steps (see links below for more on cheese making). Sometimes when milk spoils it can curdle (see link below) due to bacteria converting the primary sugar found in milk- lactose- into lactic acid which causes casein to coagulate just as you did with citric acid. The process of converting sugar to acid with bacteria is a type of fermentation, and this is how yogurt is made (although the fermentation is carefully controlled so the milk doesn't actually spoil). Variations and Related Activities: Try other citrus fruits in place of the lemon or lime, or different acids such as vinegar (acetic acid). Another interesting experiment uses fresh pineapple juice, which is too weak an acid to be very effective but also contains an enzyme that can produce curds by a different mechanism (see the Scientific American version below). You can also try different milks (low fat, skim, buttermilk, etc.) A fun extension of this experiment is to make your own casein glue. For our cottage cheese we used acid to make the casein micelles coagulate, which allowed us to separate them from the other whey proteins. The opposite of an acid is a base, and if we add a base like baking soda (sodium bicarbonate) to the casein curds we can reverse the process and re-suspend the sticky casein molecules in liquid to make a simple type of glue (links below). References and links to more information: Others versions of this activity:
Make better cottage cheese: Cheese making:
Why milk spoils: Milk Science Classroom Activities for older students:
Learn more about milk chemistry:
Making Casein Glue:
|


|
|

|

|

|

|

|