|
Have you ever wondered what makes a flour dough rise, or why there are lots of little holes inside your bread or pancakes? And what is the difference between baking soda and baking powder? Well, you're in luck because that's what this experiment is all about.
Este experimento está disponible en español Click and expand the tabs below to get started.
what you'll need
experimental procedure
what's happening
Baking soda is the common name for sodium bicarbonate, a type of substance or chemical called a base. When it is mixed with water is simply dissolves with no reaction. Baking powder, however, contains not only sodium bicarbonate but also another type of chemical called an acid (or sometimes two different acids). When these chemicals dissolve in water the base sodium bicarbonate reacts with the acid. This is called a chemical reaction because it results in the creation of one of more new and completely different substances. Acids and bases often react with each other. In this reaction the new substance is a gas called carbon dioxide, which is the tiny bubbles that you observe. You can also hear them popping as the gas escapes.
The baking soda did not react because there was no acid present, but if you add a little acid like vinegar or lemon juice then you will get a reaction that also produces carbon dioxide gas- in fact, lots of gas bubbles and foam! You may have done this reaction before to make the famous vinegar and baking soda volcano! Chemical reactions like this are used in baking breads, pancakes, cookies and other foods. When mixed with flour and water to make a dough the gas bubbles are trapped inside and cause the dough to inflate like a balloon or rise. That's what happened in the third cup when you added flour. This is called leavening, and ingredients like baking powder or baking soda are call leavening agents. Baking this dough at high temperature in an oven causes the flour molecules to lock together into a firm solid structure giving us something good to eat! Meanwhile the carbon dioxide bubbles eventually pop and the gas escapes, leaving behind the tiny little holes we see in baked goods.
variations and related activities
Some recipes use baking soda instead of baking powder because there is some other ingredient already present that provides the acid needed to produce the gas. Some recipes even use both baking soda and baking powder to produce carbon dioxide at different times during the baking.
Most baking powder used today is "Double Acting Baking Powder". It contains two different acids, one which reacts as soon as the water is added and a second acid that doesn't react until it reaches a certain high temperature. This causes the dough to rise twice- once when it is first mixed then again during baking in the oven. You can continue this activity in a tasty way with a simple homemade pancake recipe (see link below), and make it into a real experiment by making some pancakes without the baking powder and baking soda. How do these pancakes compare to the normal ones? What if you leave out one of the other ingredients? Pizza dough and some other baked goods use a very different ingredient- yeast- to make the dough rise. Yeasts are actually tiny living organisms called fungi that "eat" sugars and "burp" carbon dioxide gas. Check out the references below if you would like to experiment with yeast.
references and links to more information
What purpose do the various ingredients serve in baking?:
Try a pancake science recipe and experiment: Other baking science experiments: More baking Soda experiments:
Yeast science and baking experiments:
Hornear con gas (en español)
¿Alguna vez te has preguntado qué hace que la masa de harina se eleve o por qué hay muchos pequeños agujeros dentro de tu pan o panqueques? ¿Y cuál es la diferencia entre bicarbonato de sodio y levadura en polvo? Bueno, estás de suerte porque de eso se trata este experimento.
Lo que necesitarás
Procedimiento experimental
Qué esta pasando
Bicarbonato de sodio es el nombre común del bicarbonato de sodio, un tipo de sustancia o químico llamado base. Cuando se mezcla con agua, simplemente se disuelve sin reacción. Sin embargo, el polvo de hornear contiene no solo bicarbonato de sodio, sino también otro tipo de químico llamado ácido (oa veces dos ácidos diferentes). Cuando estos productos químicos se disuelven en agua, el bicarbonato de sodio básico reacciona con el ácido. Esto se llama reacción química porque da como resultado la creación de una o más sustancias nuevas y completamente diferentes. Los ácidos y las bases a menudo reaccionan entre sí. En esta reacción, la nueva sustancia es un gas llamado dióxido de carbono, que son las diminutas burbujas que observas. También puede escucharlos estallar cuando el gas se escapa.
El bicarbonato de sodio no reaccionó porque no había ácido presente, pero si agrega un poco de ácido como vinagre o jugo de limón, obtendrá una reacción que también produce dióxido de carbono, de hecho, ¡muchas burbujas de gas y espuma! ¡Es posible que hayas hecho esta reacción antes para hacer el famoso volcán de vinagre y bicarbonato de sodio! Las reacciones químicas como esta se utilizan para hornear panes, panqueques, galletas y otros alimentos. Cuando se mezcla con harina y agua para hacer una masa, las burbujas de gas quedan atrapadas en el interior y hacen que la masa se infle como un globo o se eleve. Eso es lo que sucedió en la tercera taza cuando agregaste harina. ¡Hornear esta masa a alta temperatura en un horno hace que las moléculas de harina se bloqueen en una estructura sólida y firme que nos da algo bueno para comer! Mientras tanto, las burbujas de dióxido de carbono eventualmente explotan y el gas escapa, dejando atrás los pequeños agujeros que vemos en los productos horneados.
Variaciones y actividades relacionadas
Algunas recetas usan bicarbonato de sodio en lugar de polvo de hornear porque ya hay algún otro ingrediente presente que proporciona el ácido necesario para producir el gas. Algunas recetas incluso usan bicarbonato de sodio y polvo de hornear para producir dióxido de carbono en diferentes momentos durante la cocción.
La mayor parte del polvo de hornear que se usa hoy en día es el "polvo de hornear de doble acción". Contiene dos ácidos diferentes, uno que reacciona tan pronto como se agrega el agua y un segundo ácido que no reacciona hasta que alcanza una cierta temperatura alta. Esto hace que la masa suba dos veces, una cuando se mezcla por primera vez y luego nuevamente durante la cocción en el horno. Puede continuar este experimento de una manera sabrosa con una receta de panqueques casera simple (link abajo). La masa de pizza y algunos otros productos horneados utilizan un ingrediente muy diferente, la levadura, para hacer que la masa suba. Las levaduras son en realidad pequeños organismos vivos llamados hongos que "comen" azúcares y "eructan" gas de dióxido de carbono. Consulte las referencias a continuación si desea experimentar con levadura
0 Comments
What you'll need:
As always, be sure to ask your mom, dad or another adult to help- they'll want to taste your result. All utensils and ingredients should be clean and food-safe if you want to taste your results. Experimental Procedure:
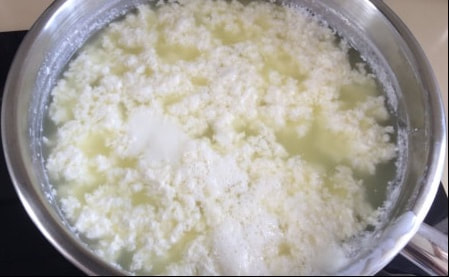
What's Happening: Mother's milk is an amazing substance, which really isn't surprising considering that it contains all of the nutrients a baby needs to survive and grow. The plain white liquid you see is actually a uniform (homogenous) mixture consisting of fats or oils (composed of molecules called fatty acids), sugars, proteins, vitamins and some other chemicals, but mostly water molecules. This is called an emulsion or suspension- a mixture of liquids and solids, most of which are not truly dissolved. Normally these various components would separate (and in raw or non-homogenized milk some, notably the fats, still do), but the protein and fat molecules have both hydrophilic (water-loving) and hydrophobic (water-hating) regions, which causes these long molecules to twist around and group together into more stable arrangements, making it possible for them to stay suspended in the water that makes up most of milk by volume. The proteins form micelles, sort of like little water balloons (or in this case, protein balloons), with their hydrophobic ends on the inside and their hydrophilic ends on the outside facing the water molecules. The fat molecules form similar but much larger balloon-like structures called globules. Our "I can't believe It IS Butter!" experiment dealt with the fat globules in milk, while in this experiment we focus instead on the protein micelles. There are dozens of different proteins in milk, but they can be grouped into two main categories: the so-called curds and whey proteins from the "Little Miss Muffet" nursery rhyme. In cow's milk the curd proteins, called caseins, outnumber whey proteins about 4 to 1 by weight. One important difference is that caseins will coagulate or form solid clumps under acidic conditions while the whey proteins will remain suspended in the liquid, and that is what is happening in this experiment. Milk solid curds are used to make cheeses, or in our case cottage cheese. Most cottage cheese you buy in the grocery store is salted, which is why the cottage cheese curds you made may have tasted a little different (you may have also tasted the lemon or lime if you didn't rinse them well). Lemons and limes have an acid called citric acid in their juice, as do other citrus fruits like oranges and grapefruit. Normally the casein micelles have negative electric charge on their outer surfaces so that they all repel each other and remain suspended in milk. When you added lemon or lime juice to your milk the citric acid neutralized these negative charges and allowed micelles to begin sticking together in larger and larger clumps, which also trap much of the fat in the milk as they form. We can also say that the milk has curdled. It was these casein curds that you caught in your strainer, while the liquid that passed through contained the remaining whey proteins. Heating the milk also strongly enhances this coagulation process. Special chemicals called enzymes can also be used to produce milk curds (described in some of the links below). In this experiment you produced a simple cottage cheese, which is essentially the first step in making any kind of cheese, though most types require many more steps (see links below for more on cheese making). Sometimes when milk spoils it can curdle (see link below) due to bacteria converting the primary sugar found in milk- lactose- into lactic acid which causes casein to coagulate just as you did with citric acid. The process of converting sugar to acid with bacteria is a type of fermentation, and this is how yogurt is made (although the fermentation is carefully controlled so the milk doesn't actually spoil). Variations and Related Activities: Try other citrus fruits in place of the lemon or lime, or different acids such as vinegar (acetic acid). Another interesting experiment uses fresh pineapple juice, which is too weak an acid to be very effective but also contains an enzyme that can produce curds by a different mechanism (see the Scientific American version below). You can also try different milks (low fat, skim, buttermilk, etc.) A fun extension of this experiment is to make your own casein glue. For our cottage cheese we used acid to make the casein micelles coagulate, which allowed us to separate them from the other whey proteins. The opposite of an acid is a base, and if we add a base like baking soda (sodium bicarbonate) to the casein curds we can reverse the process and re-suspend the sticky casein molecules in liquid to make a simple type of glue (links below). References and links to more information: Others versions of this activity:
Make better cottage cheese: Cheese making:
Why milk spoils: Milk Science Classroom Activities for older students:
Learn more about milk chemistry:
Making Casein Glue:
|


|
|

|

|

|

|

|